Connect a frontend
This guide describes how to create a frontend or client app that interacts with a Lisk blockchain network.
| A Lisk blockchain network is a network of nodes that are built with the Lisk SDK. |
Choose a framework
Choose a framework based on personal preference.
| Lisk uses React.js as a framework of choice for the examples provided in the documentation. |
Some popular framework examples for developing apps are listed below:
| This guide covers how to build a frontend based on the Create React App guide to create a frontend application. |
Create project structure
| See the full code example of Hello World in GitHub. |
$ tree -I 'node_modules|client/node_modules|react-client/node_modules'
.
├── README.md
├── index.js
├── package-lock.json
├── package.json
├── react-client
│   ├── README.md
│   ├── package-lock.json
│   ├── package.json
│   ├── public
│   │   ├── favicon.ico
│   │   ├── index.html
│   │   ├── logo192.png
│   │   ├── logo512.png
│   │   ├── manifest.json
│   │   └── robots.txt
│   ├── src
│   │   ├── App.css
│   │   ├── accounts.json
│   │   ├── api.js
│   │   ├── assets
│   │   ├── components
│   │   │   ├── Accounts.js
│   │   │   ├── App.js
│   │   │   ├── Blocks.js
│   │   │   ├── Faucet.js
│   │   │   ├── Hello.js
│   │   │   ├── HelloAccounts.js
│   │   │   ├── HelloTransactions.js
│   │   │   ├── NewAccount.js
│   │   │   ├── Transactions.js
│   │   │   └── Transfer.js
│   │   ├── index.css
│   │   ├── index.js
│   │   └── logo.svg
│   └── yarn.lock
└── transactions
    ├── hello_transaction.js
    ├── index.js
    └── package.json
Setup
Install and run backend
Install
Firstly, ensure you have all Lisk SDK dependencies installed, and have a fresh database lisk_dev.
| Dependencies | Version |
|---|---|
Node.js |
12.15.0 |
PostgreSQL |
10+ |
Redis (optional) |
5+ |
Python |
2 |
Clone the lisk-sdk-examples in GitHub and navigate into hello_world folder.
git clone https://github.com/LiskHQ/lisk-sdk-examples.git
cd lisk-sdk-examples/hello_world
npm iInstall and run frontend
Install
Next, install all dependencies for the react-client application as shown below:
cd react-client
npm i
Run
Now start the web server as shown below:
npm start
# Compiled successfully!
#
#  You can now view react-client in the browser.
#
#    Local:            http://localhost:3000
#    On Your Network:  http://192.168.178.34:3000
#
#  Note that the development build is not optimized.
#  To create a production build, use yarn build.
This will open the client app in the browser, under http://localhost:3000.
At this point, it should now be possible to see a basic frontend for the Hello World application which allows the user to perform the following tasks:
-
Create new accounts.
-
Send tokens to accounts.
-
Get tokens from a faucet.
-
Send
Hellotransactions. -
Explore all blocks.
-
Explore all transactions and
Hellotransactions. -
Explore all
Hellotransactions. -
Explore all accounts and
Helloaccounts. -
Explore all
Helloaccounts.
| Use this client as a template or reference for your own client applications, and adjust it to suit your specific requirements. |
React app
The react app starts from index.js and renders the App component inside of the body tag of index.html.
import React from 'react';
import ReactDOM from 'react-dom';
import 'bootstrap/dist/css/bootstrap.css';
import './index.css';
import App from './components/App';
import * as serviceWorker from './serviceWorker';


ReactDOM.render(<App />, document.getElementById('root'));

// If you want your app to work offline and load faster, you can change
// unregister() to register() below. Please note:  this comes with some pitfalls.
// Learn more about service workers: https://bit.ly/CRA-PWA
serviceWorker.unregister();<!DOCTYPE html>
<html lang="en">
<head>
<meta charset="utf-8" />
<link rel="icon" href="%PUBLIC_URL%/favicon.ico" />
<meta name="viewport" content="width=device-width, initial-scale=1" />
<meta name="theme-color" content="#000000" />
<meta
name="description"
content="Web site created using create-react-app"
/>
<link rel="apple-touch-icon" href="%PUBLIC_URL%/logo192.png" />
<!--
manifest.json provides metadata used when your web app is installed on a
user's mobile device or desktop. See https://developers.google.com/web/fundamentals/web-app-manifest/
-->
<link rel="manifest" href="%PUBLIC_URL%/manifest.json" />
<!--
Notice the use of %PUBLIC_URL% in the tags above.
It will be replaced with the URL of the `public` folder during the build.
Only files inside the `public` folder can be referenced from the HTML.
Unlike "/favicon.ico" or "favicon.ico", "%PUBLIC_URL%/favicon.ico" will
work correctly both with client-side routing and a non-root public URL.
Learn how to configure a non-root public URL by running `npm run build`.
-->
<title>React App</title>
</head>
<body>
<noscript>You need to enable JavaScript to run this app.</noscript>
<div id="root"></div>
<!--
This HTML file is a template.
If you open it directly in the browser, you will see an empty page.
You can add webfonts, meta tags, or analytics to this file.
The build step will place the bundled scripts into the <body> tag.
To begin the development, run `npm start` or `yarn start`.
To create a production bundle, use `npm run build` or `yarn build`.
-->
</body>
</html>The main component is App.js.
It imports all other components and defines the routes for the components.
import React from "react";
import {
    BrowserRouter as Router,
    Switch,
    Route,
    Link
} from "react-router-dom";
import NewAccount from './NewAccount';
import Accounts from './Accounts';
import HelloAccounts from './HelloAccounts';
import Faucet from './Faucet';
import SendTransfer from './Transfer';
import SendHello from './Hello';
import Transactions from './Transactions';
import HelloTransactions from './HelloTransactions';
import Blocks from './Blocks';

// The pages of this site are rendered dynamically
// in the browser (not server rendered).

export default function App() {
    return (
        <Router>
            <div>
                <ul>
                    <li><Link to="/">Home</Link></li>
                    <hr />
                    <h3> Interact </h3>
                    <li><Link to="/new-account">New Account</Link></li>
                    <li><Link to="/faucet">Faucet</Link></li>
                    <li><Link to="/send-transfer">Send tokens</Link></li>
                    <li><Link to="/send-hello">Send Hello</Link></li>
                    <hr />
                    <h3> Explore </h3>
                    <li><Link to="/accounts">Accounts</Link></li>
                    <li><Link to="/hello-accounts">Hello accounts</Link></li>
                    <li><Link to="/transactions">Transactions</Link></li>
                    <li><Link to="/hello-transactions">Hello transactions</Link></li>
                    <li><Link to="/blocks">Blocks</Link></li>
                </ul>

                <hr />

                {/*
                  A <Switch> looks through all its children <Route>
                  elements and renders the first one whose path
                  matches the current URL. Use a <Switch> any time
                  you have multiple routes, but you want to render only one
                  of them at a time
                */}
                <Switch>
                    <Route exact path="/">
                        <Home />
                    </Route>
                    <Route path="/new-account">
                        <NewAccount />
                    </Route>
                    <Route path="/faucet">
                        <Faucet />
                    </Route>
                    <Route path="/send-transfer">
                        <SendTransfer />
                    </Route>
                    <Route path="/send-hello">
                        <SendHello />
                    </Route>
                    <Route path="/accounts">
                        <Accounts />
                    </Route>
                    <Route path="/hello-accounts">
                        <HelloAccounts />
                    </Route>
                    <Route path="/blocks">
                        <Blocks />
                    </Route>
                    <Route path="/transactions">
                        <Transactions />
                    </Route>
                    <Route path="/hello-transactions">
                        <HelloTransactions />
                    </Route>
                </Switch>
            </div>
        </Router>
    );
}

/* Functional components */

function Home() {
    return (
        <div>
            <h2>Hello Lisk!</h2>
            <p>A simple frontend for blockchain applications built with the Lisk SDK.</p>
        </div>
    );
}
The Home component, which is defined as function at the bottom of App.js, is rendered as the start page:
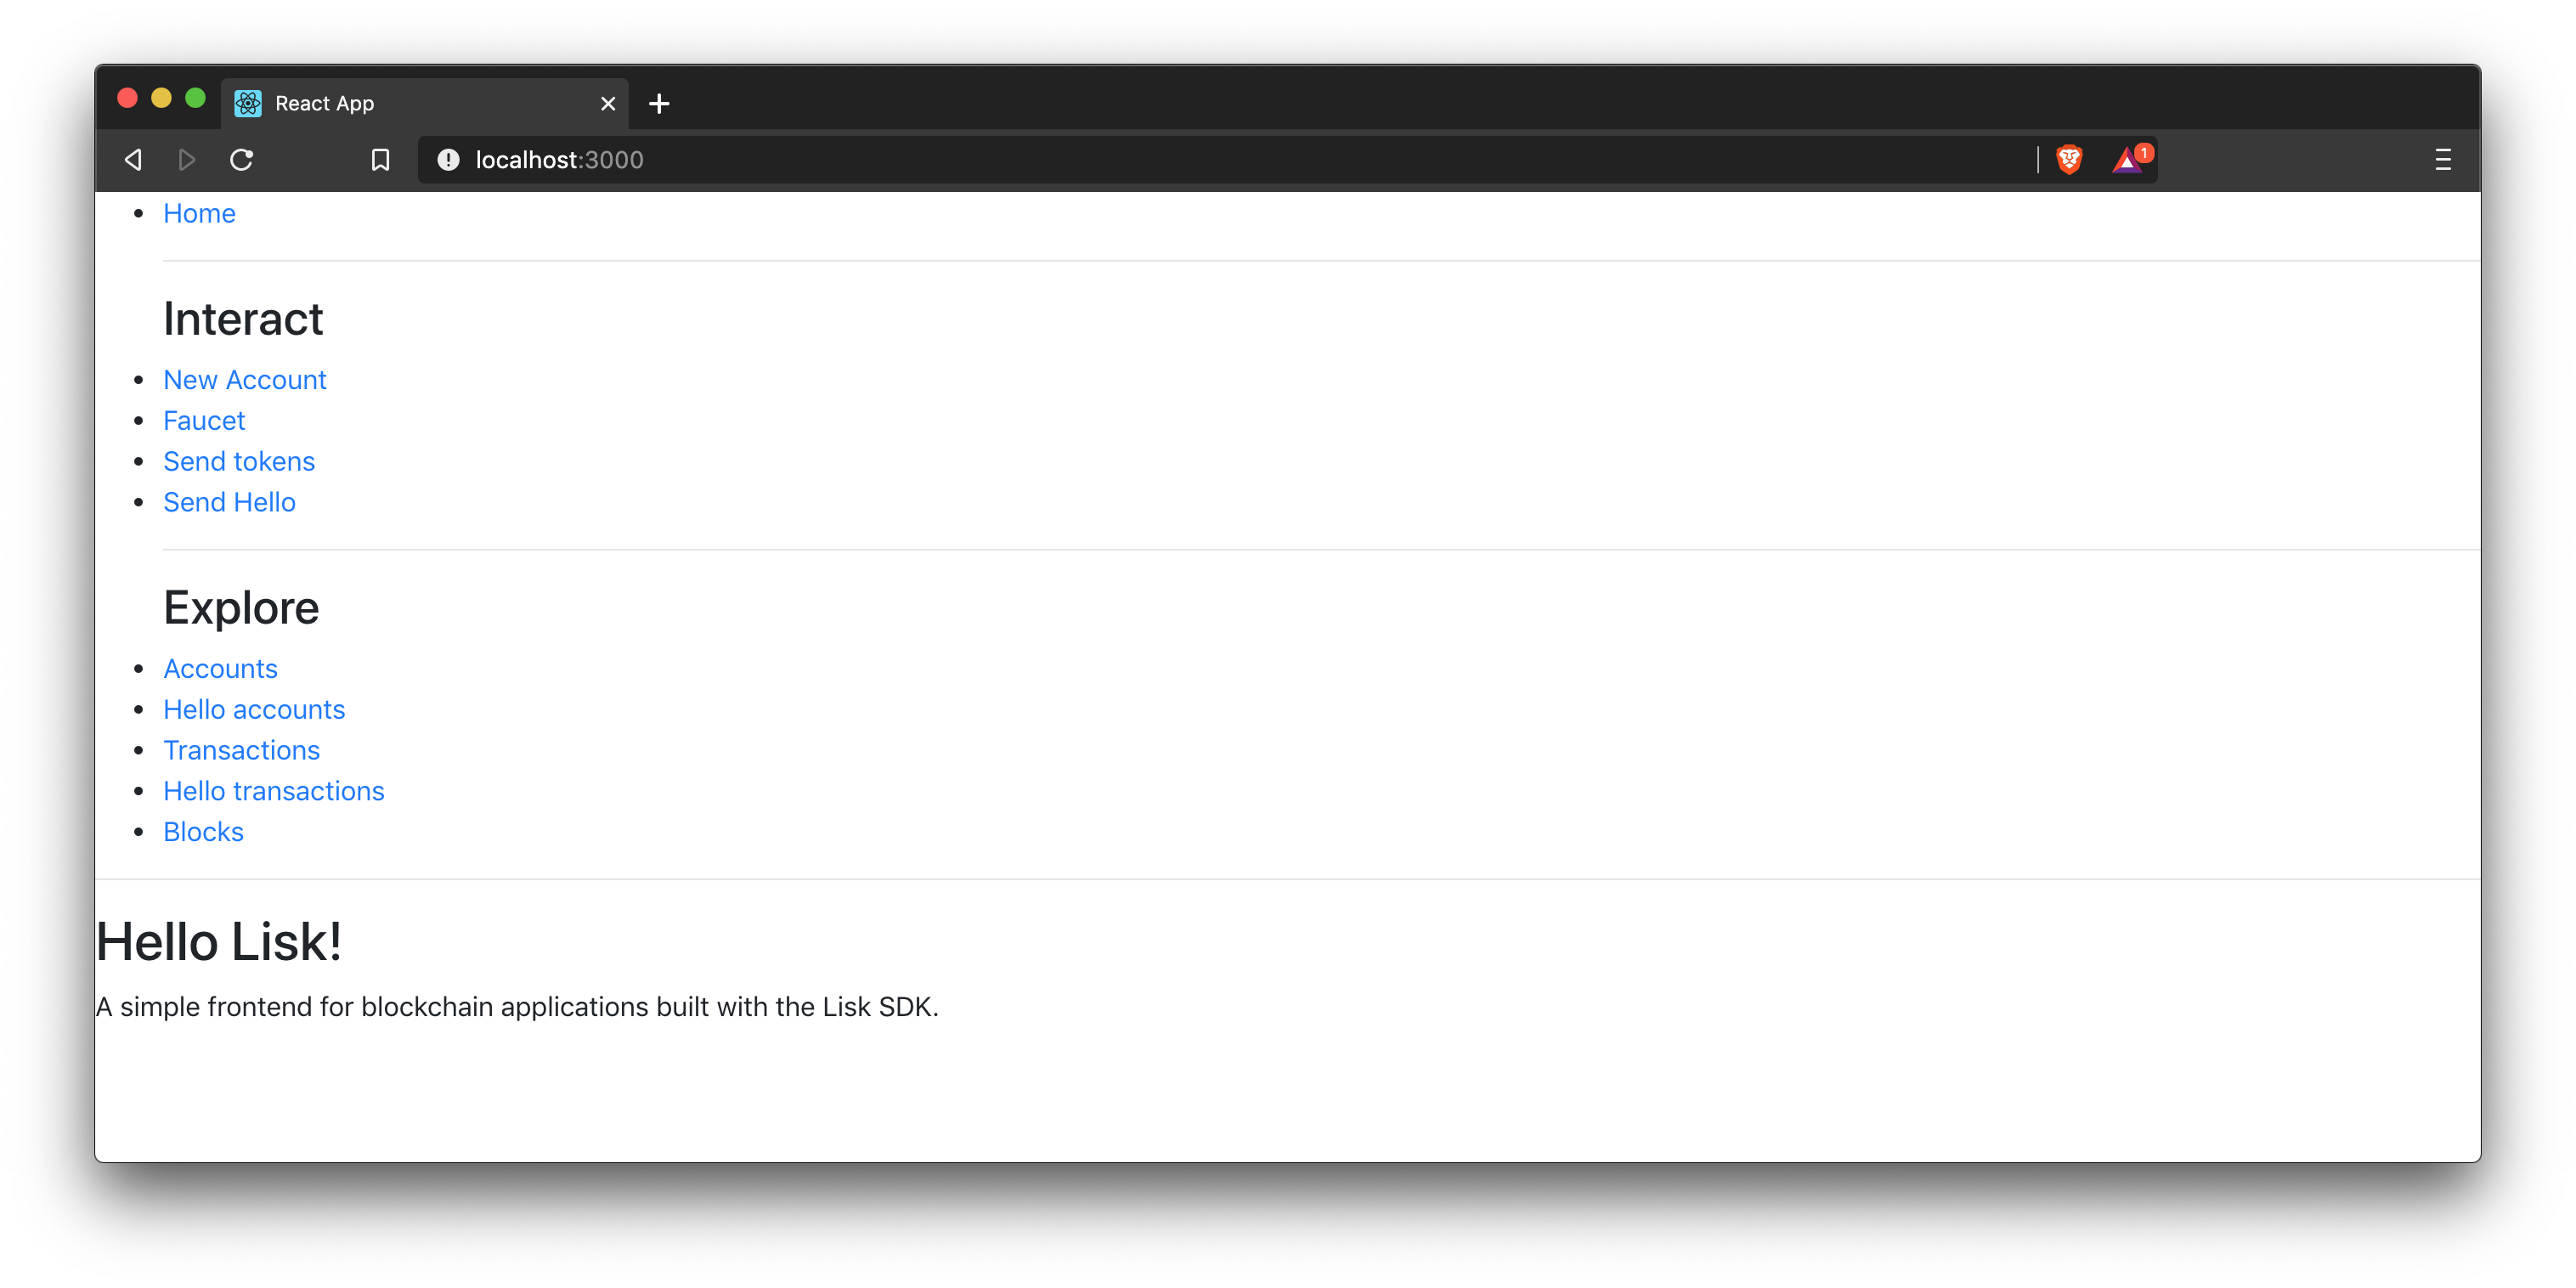
|
It is both possible to define components as functions or as classes. Although classes give more flexibility, functional components can be convenient, e.g. as less code is required to write them. For reference purposes, see also Functional vs Class-Components in React. |
API client
It is recommended to define the API client in a single file, and import it where required.
If the API url changes in the future, it is only required to update the API_BASEURL.
import { APIClient } from '@liskhq/lisk-api-client';

const API_BASEURL = 'http://localhost:4000';

export const api = new APIClient([API_BASEURL]);
The API client will be imported into the necessary components shown below:
Pages
Implement the logic and structure of the different pages of the client app.
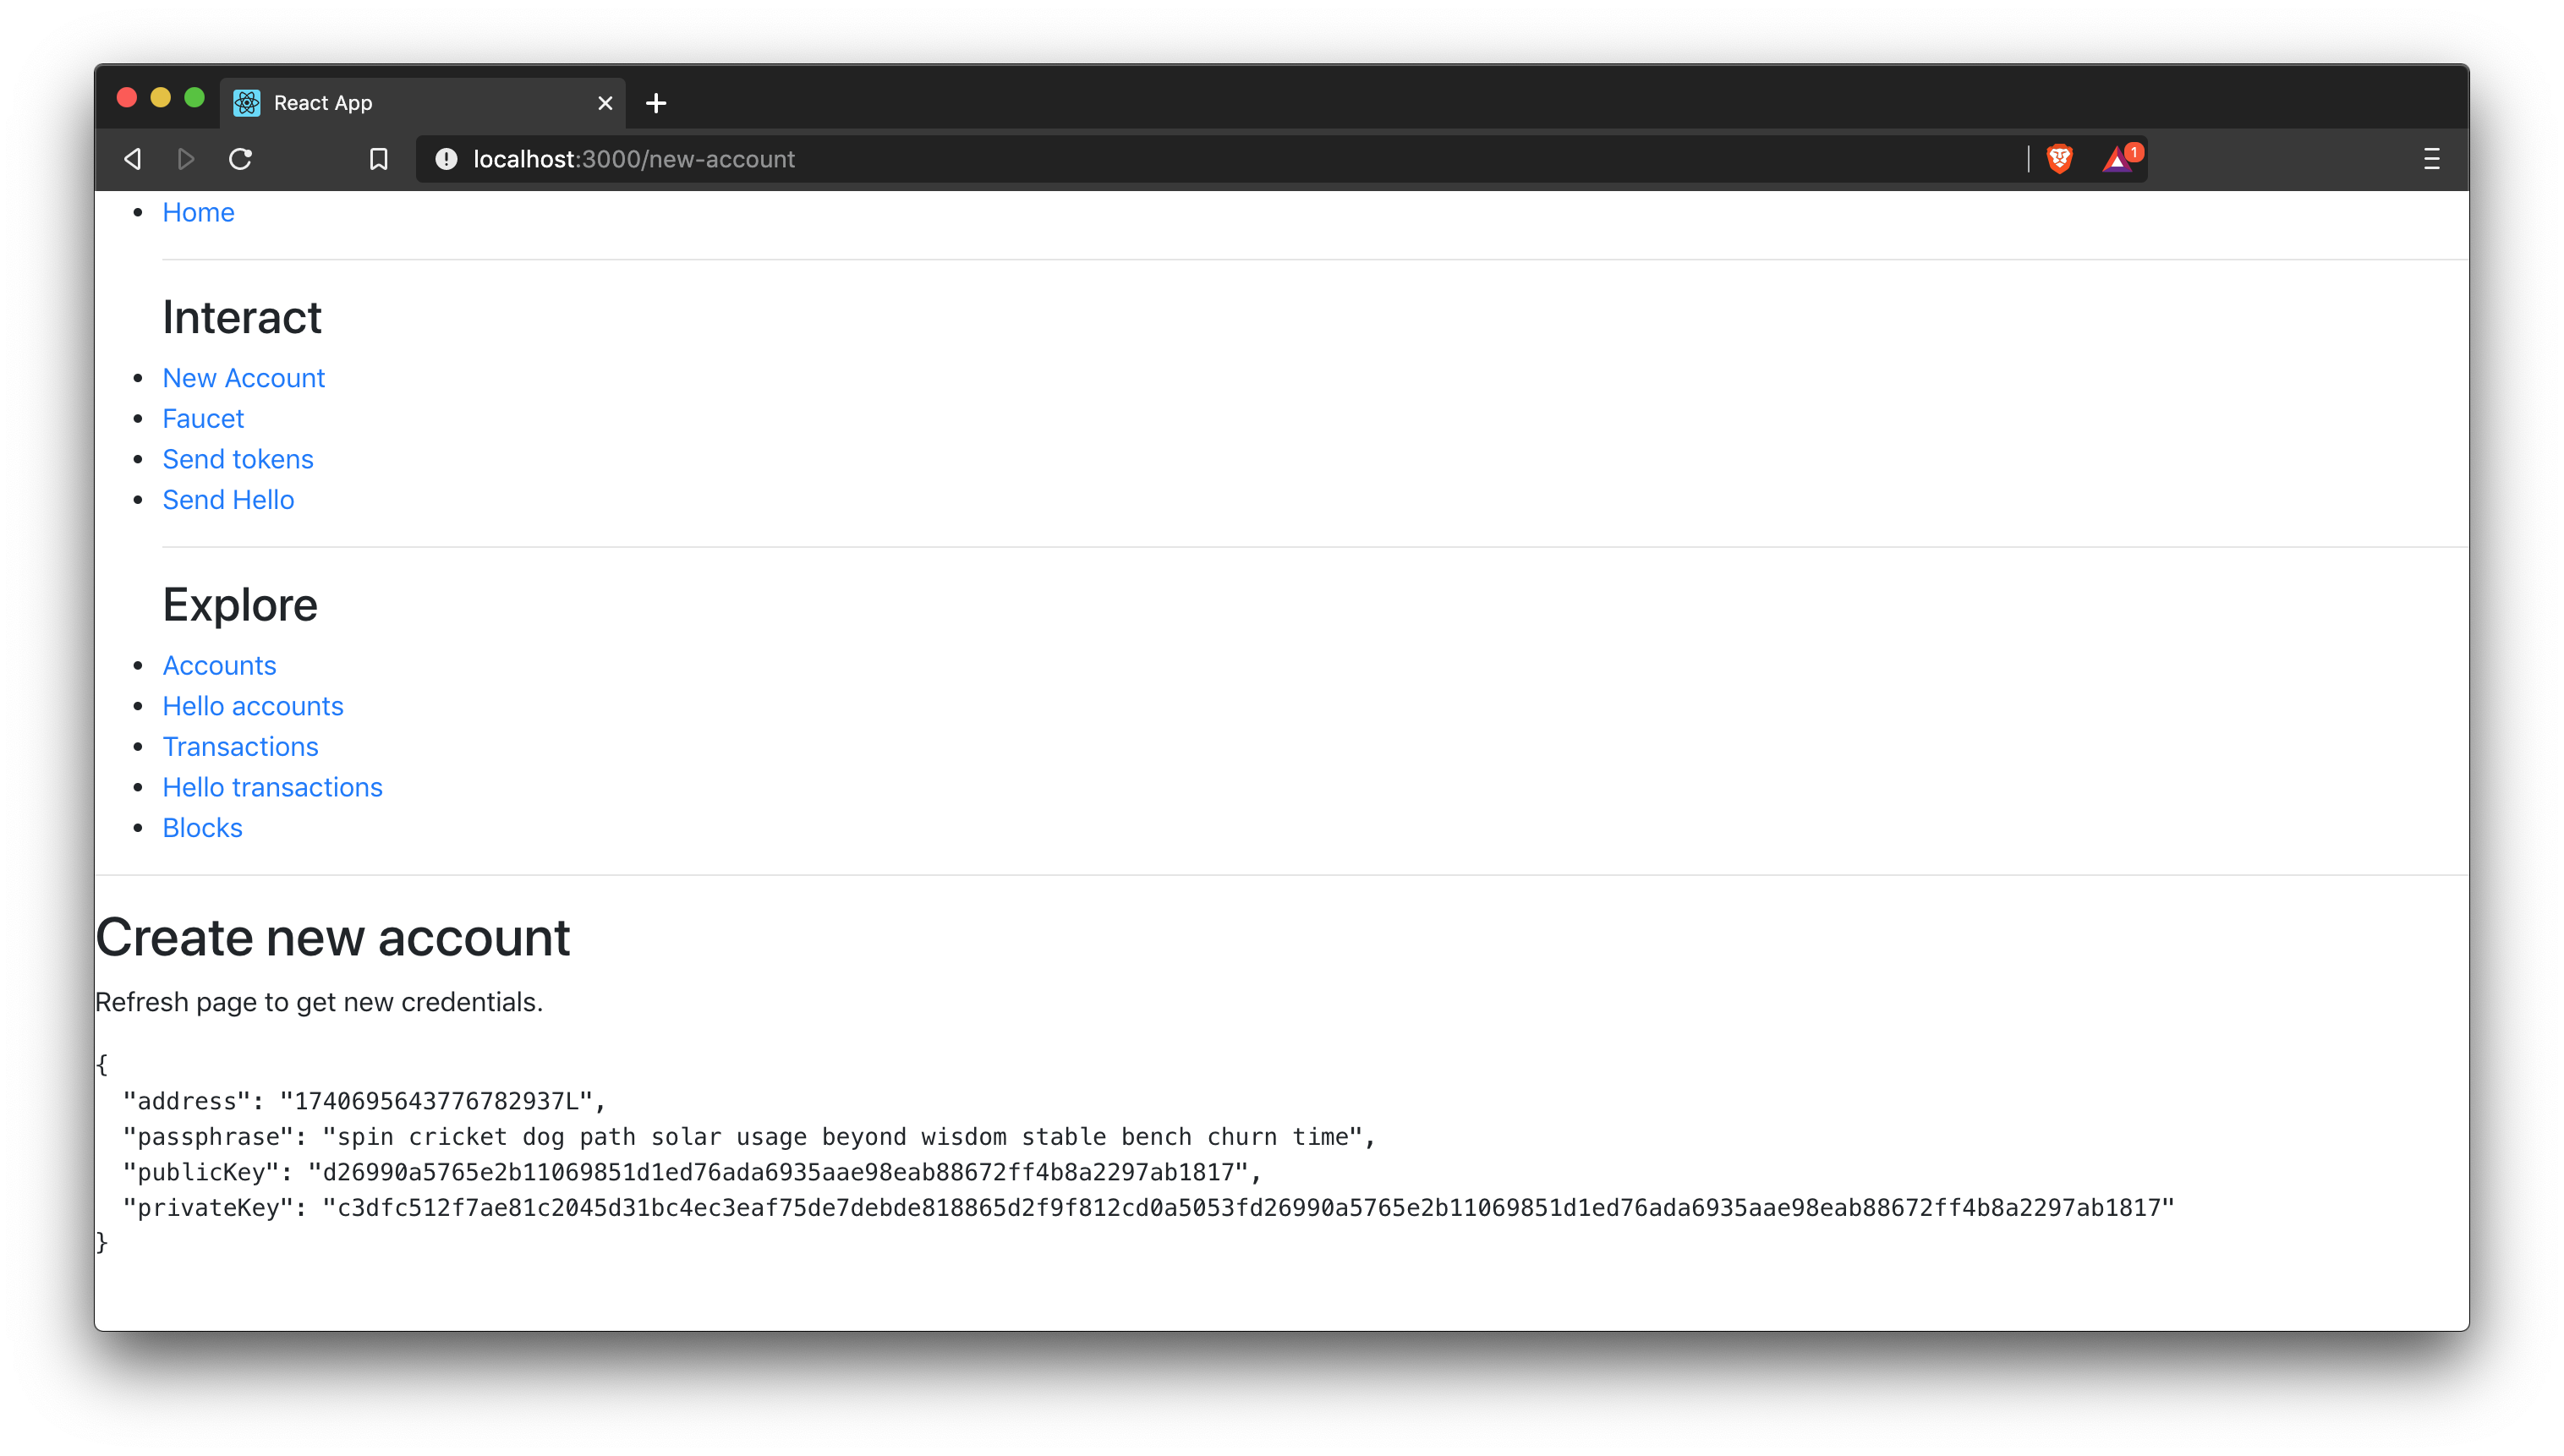
New account
This page generates the credentials for a new account in the network.
import React, { Component } from 'react';
import * as cryptography from '@liskhq/lisk-cryptography';
import { Mnemonic } from '@liskhq/lisk-passphrase';

const newCredentials = () => {
    const passphrase = Mnemonic.generateMnemonic();
    const keys = cryptography.getPrivateAndPublicKeyFromPassphrase(
        passphrase
    );
    const credentials = {
        address: cryptography.getAddressFromPublicKey(keys.publicKey),
        passphrase: passphrase,
        publicKey: keys.publicKey,
        privateKey: keys.privateKey
    };
    return credentials;
};

class NewAccount extends Component {

    constructor(props) {
        super(props);

        this.state = { credentials: newCredentials() };
    }

    render() {
        return (
            <div>
                <h2>Create new account</h2>
                <p>Refresh page to get new credentials.</p>
                <pre>{JSON.stringify(this.state.credentials, null, 2)}</pre>
            </div>
        );
    }
}
export default NewAccount;
Faucet
A faucet is usually connected to a well funded account in the network, that is used as the source to send funds to accounts in order to get started. It is therefore primarily useful for Devnets or Testnets.
In this example the genesis account is used in the faucet. In order to simplify this no restrictions are set for the maximum amount and the frequency of requesting new tokens.
import React, { Component } from 'react';
import { api } from '../api.js';
import accounts from '../accounts.json';
import{ TransferTransaction, utils } from '@liskhq/lisk-transactions';
import * as cryptography from '@liskhq/lisk-cryptography';

const networkIdentifier = cryptography.getNetworkIdentifier(
    "23ce0366ef0a14a91e5fd4b1591fc880ffbef9d988ff8bebf8f3666b0c09597d",
    "Lisk",
);

class Faucet extends Component {

    constructor(props) {
        super(props);

        this.state = {
            address: '',
            amount: '',
            response: { meta: { status: false }},
            transaction: {},
        };
    }

    handleChange = (event) => {
        let nam = event.target.name;
        let val = event.target.value;
        this.setState({[nam]: val});
    };

    handleSubmit = (event) => {
        event.preventDefault();

        const fundTransaction = new TransferTransaction({
            asset: {
                recipientId: this.state.address,
                amount: utils.convertLSKToBeddows(this.state.amount),
            },
            networkIdentifier: networkIdentifier,
            timestamp: utils.getTimeFromBlockchainEpoch(new Date()),
        });

        //The TransferTransaction is signed by the Genesis account
        fundTransaction.sign(accounts.genesis.passphrase);
        api.transactions.broadcast(fundTransaction.toJSON()).then(response => {
            this.setState({response:response});
            this.setState({transaction:fundTransaction});
        }).catch(err => {
            console.log(JSON.stringify(err.errors, null, 2));
        });
    }

    render() {
        return (
            <div>
                <h2>Faucet</h2>
                <p>The faucet transfers tokens from the genesis account to another.</p>
                <form onSubmit={this.handleSubmit}>
                    <label>
                        Address:
                        <input type="text" id="address" name="address" onChange={this.handleChange} />
                    </label>
                    <label>
                        Amount (1 = 10^8 tokens):
                        <input type="text" id="amount" name="amount" onChange={this.handleChange} />
                    </label>
                    <input type="submit" value="Submit" />
                </form>
                {this.state.response.meta.status &&
                    <div>
                        <pre>Transaction: {JSON.stringify(this.state.transaction, null, 2)}</pre>
                        <p>Response: {JSON.stringify(this.state.response, null, 2)}</p>
                    </div>
                }
            </div>
        );
    }
}
export default Faucet;
Send default transaction
How to send a default transaction from a web page is covered here.
In this example shown below, a transfer transaction is sent.
import React, { Component } from 'react';
import { api } from '../api.js';
import{ TransferTransaction, utils } from '@liskhq/lisk-transactions';
import * as cryptography from '@liskhq/lisk-cryptography';

const networkIdentifier = cryptography.getNetworkIdentifier(
    "23ce0366ef0a14a91e5fd4b1591fc880ffbef9d988ff8bebf8f3666b0c09597d",
    "Lisk",
);

class Transfer extends Component {

    constructor(props) {
        super(props);

        this.state = {
            address: '',
            amount: '',
            passphrase: '',
            response: { meta: { status: false }},
            transaction: {},
        };
    }

    handleChange = (event) => {
        let nam = event.target.name;
        let val = event.target.value;
        this.setState({[nam]: val});
    };

    handleSubmit = (event) => {
        event.preventDefault();

        const transferTransaction = new TransferTransaction({
            asset: {
                recipientId: this.state.address,
                amount: utils.convertLSKToBeddows(this.state.amount),
            },
            networkIdentifier: networkIdentifier,
            //timestamp: dateToLiskEpochTimestamp(new Date()),
            timestamp: utils.getTimeFromBlockchainEpoch(new Date()),
        });

        transferTransaction.sign(this.state.passphrase);
        api.transactions.broadcast(transferTransaction.toJSON()).then(response => {
            this.setState({response:response});
            this.setState({transaction:transferTransaction});
        }).catch(err => {
            console.log(JSON.stringify(err.errors, null, 2));
        });
    }

    render() {
        return (
            <div>
                <h2>Transfer</h2>
                <p>Send tokens from one account to another.</p>
                <form onSubmit={this.handleSubmit}>
                    <label>
                        Recipient:
                        <input type="text" id="address" name="address" onChange={this.handleChange} />
                    </label>
                    <label>
                        Amount (1 = 10^8 tokens):
                        <input type="text" id="amount" name="amount" onChange={this.handleChange} />
                    </label>
                    <label>
                        Passphrase:
                        <input type="text" id="passphrase" name="passphrase" onChange={this.handleChange} />
                    </label>
                    <input type="submit" value="Submit" />
                </form>
                {this.state.response.meta.status &&
                <div>
                    <pre>Transaction: {JSON.stringify(this.state.transaction, null, 2)}</pre>
                    <p>Response: {JSON.stringify(this.state.response, null, 2)}</p>
                </div>
                }
            </div>
        );
    }
}
export default Transfer;
Send custom transactions
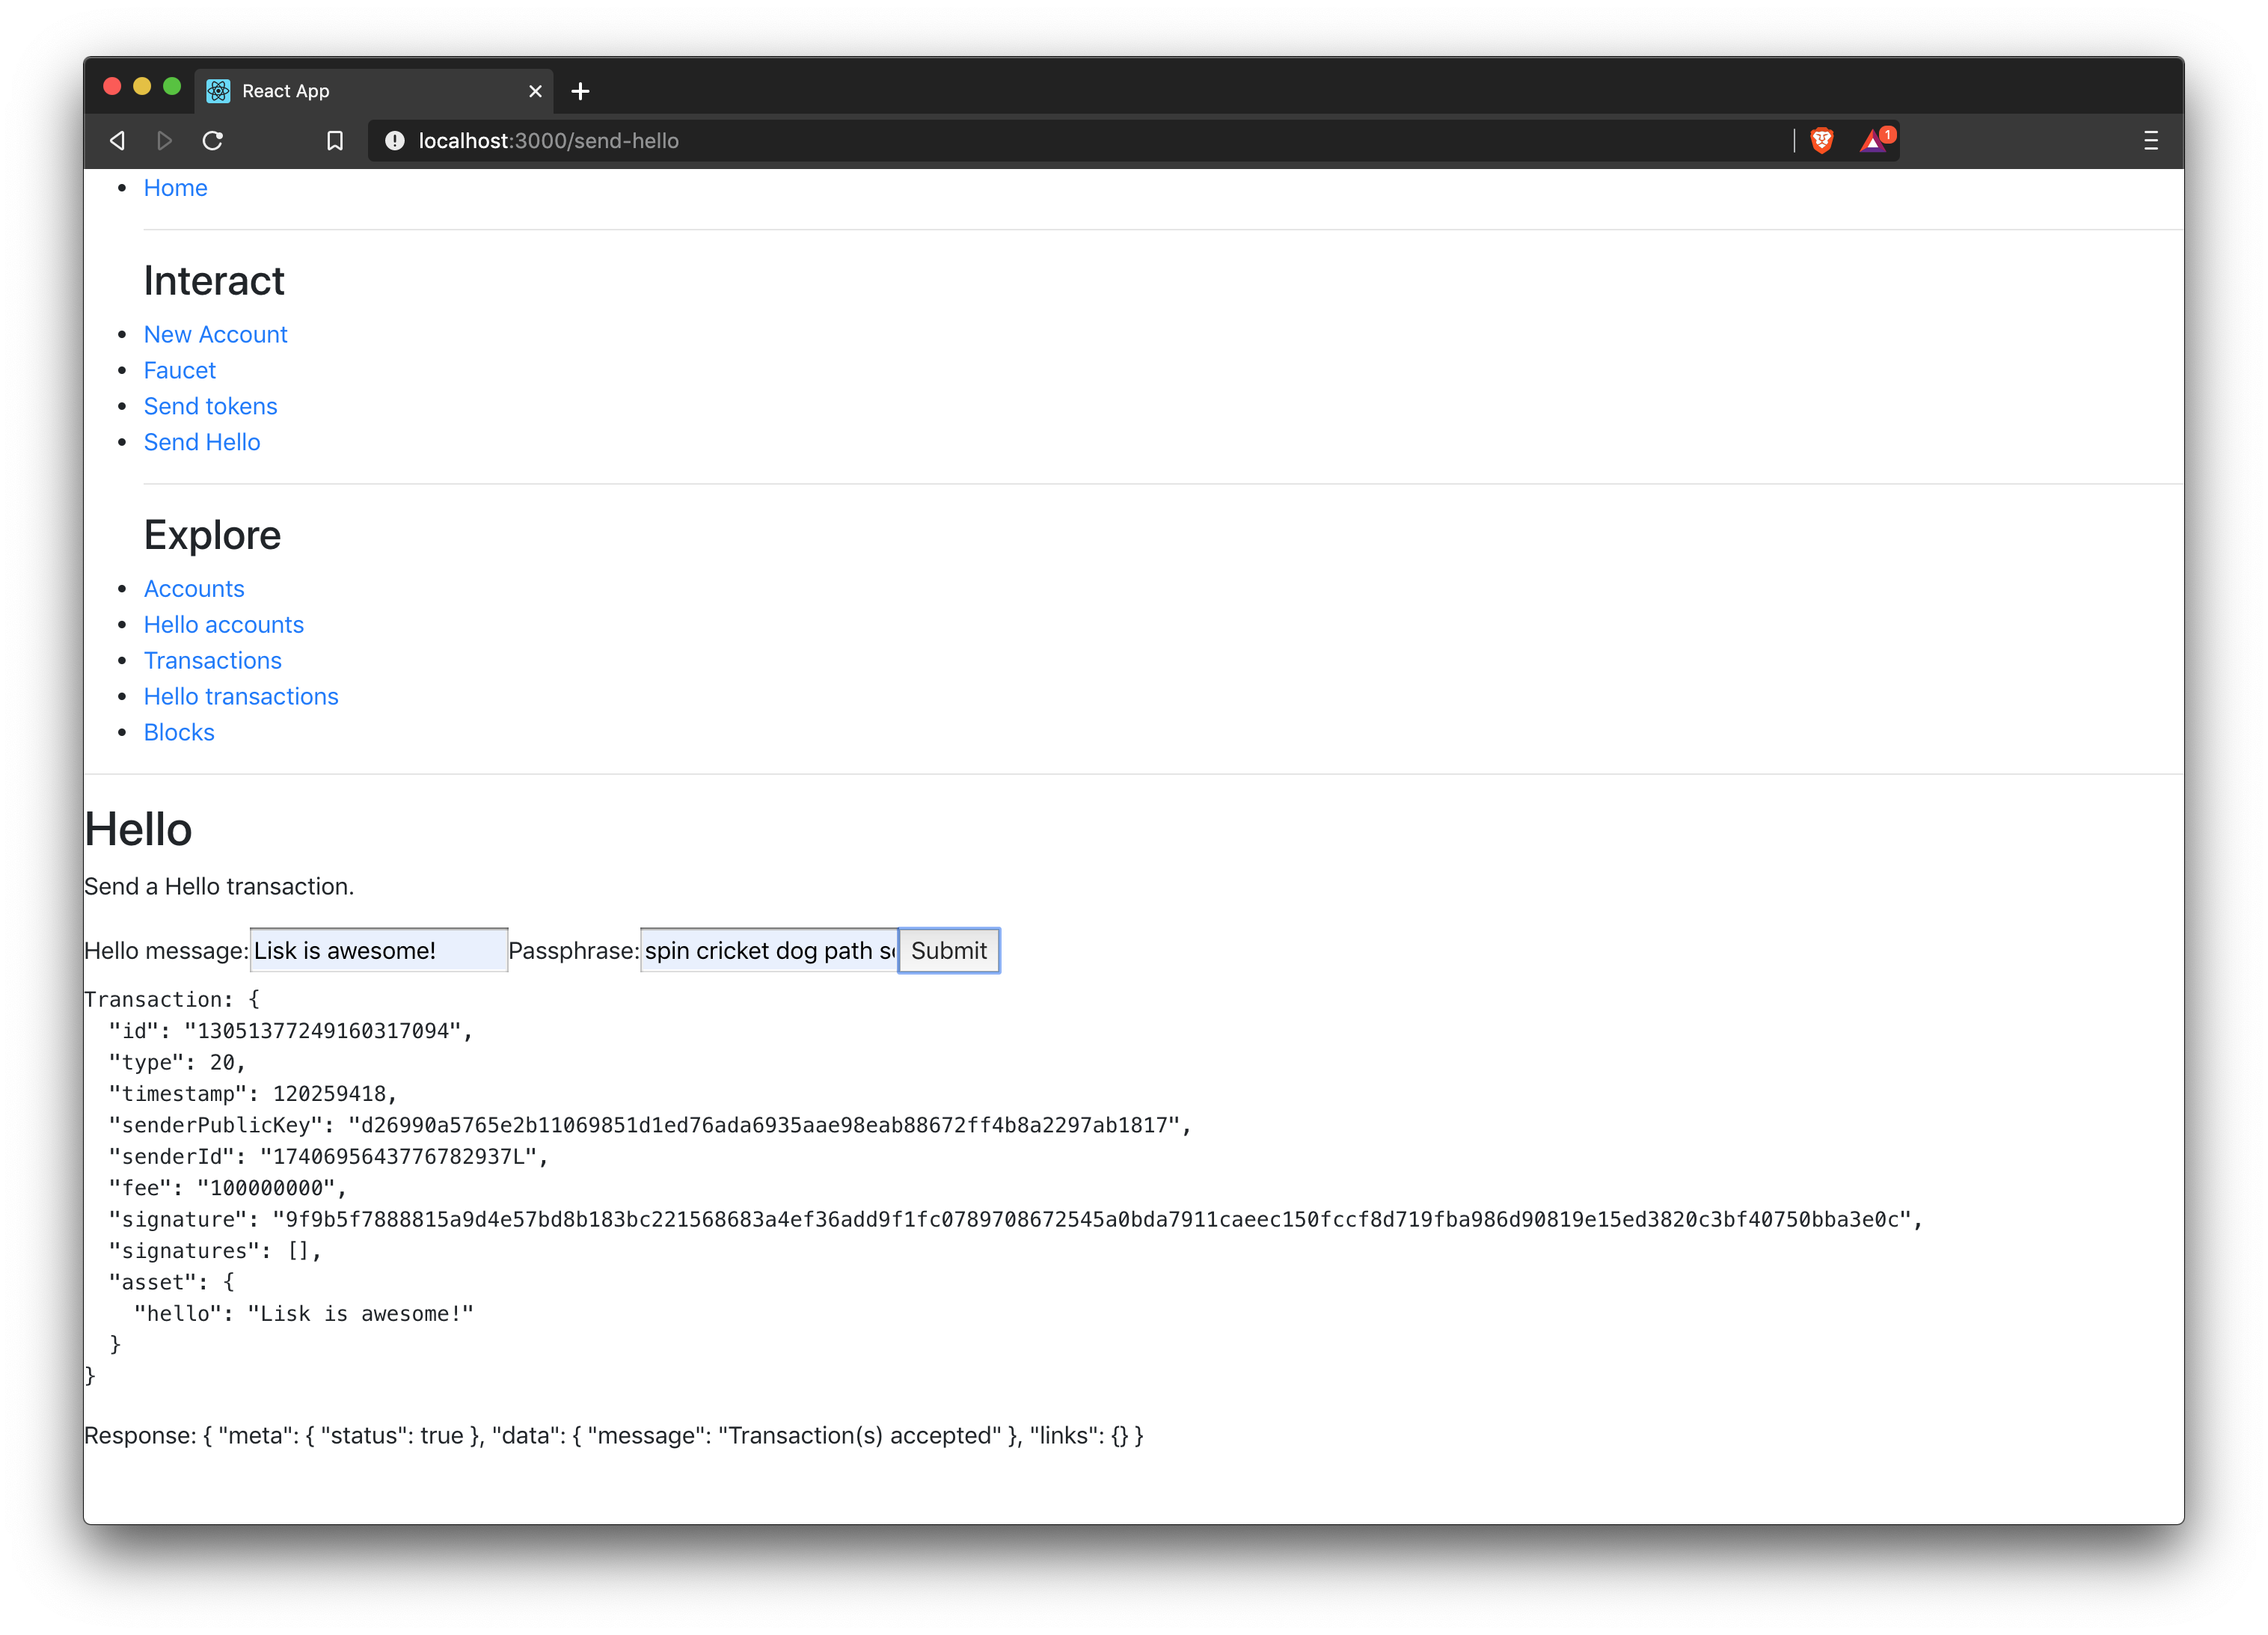
How to send a custom transaction from a web page is described here.
In this example shown below, a hello transaction is sent.
import React, { Component } from 'react';
import {
    HelloTransaction,
} from 'lisk-hello-transactions';
import { api } from '../api.js';
import * as cryptography from '@liskhq/lisk-cryptography';
import {utils} from "@liskhq/lisk-transactions";

const networkIdentifier = cryptography.getNetworkIdentifier(
    "23ce0366ef0a14a91e5fd4b1591fc880ffbef9d988ff8bebf8f3666b0c09597d",
    "Lisk",
);

class Hello extends Component {

    constructor(props) {
        super(props);

        this.state = {
            hello: '',
            passphrase: '',
            response: { meta: { status: false }},
            transaction: {},
        };
    }

    handleChange = (event) => {
        let nam = event.target.name;
        let val = event.target.value;
        this.setState({[nam]: val});
    };

    handleSubmit = (event) => {
        event.preventDefault();

        const helloTransaction = new HelloTransaction({
            asset: {
                hello: this.state.hello,
            },
            networkIdentifier: networkIdentifier,
            timestamp: utils.getTimeFromBlockchainEpoch(new Date()),
        });

        helloTransaction.sign(this.state.passphrase);
        api.transactions.broadcast(helloTransaction.toJSON()).then(response => {
            this.setState({response:response});
            this.setState({transaction:helloTransaction});
        }).catch(err => {
            console.log(JSON.stringify(err, null, 2));
        });
    }

    render() {
        return (
            <div>
                <h2>Hello</h2>
                <p>Send a Hello transaction.</p>
                <form onSubmit={this.handleSubmit}>
                    <label>
                        Hello message:
                        <input type="text" id="hello" name="hello" onChange={this.handleChange} />
                    </label>
                    <label>
                        Passphrase:
                        <input type="text" id="passphrase" name="passphrase" onChange={this.handleChange} />
                    </label>
                    <input type="submit" value="Submit" />
                </form>
                {this.state.response.meta.status &&
                <div>
                    <pre>Transaction: {JSON.stringify(this.state.transaction, null, 2)}</pre>
                    <p>Response: {JSON.stringify(this.state.response, null, 2)}</p>
                </div>
                }
            </div>
        );
    }
}
export default Hello;
Get all accounts
How to display all accounts on a web page can be found here.
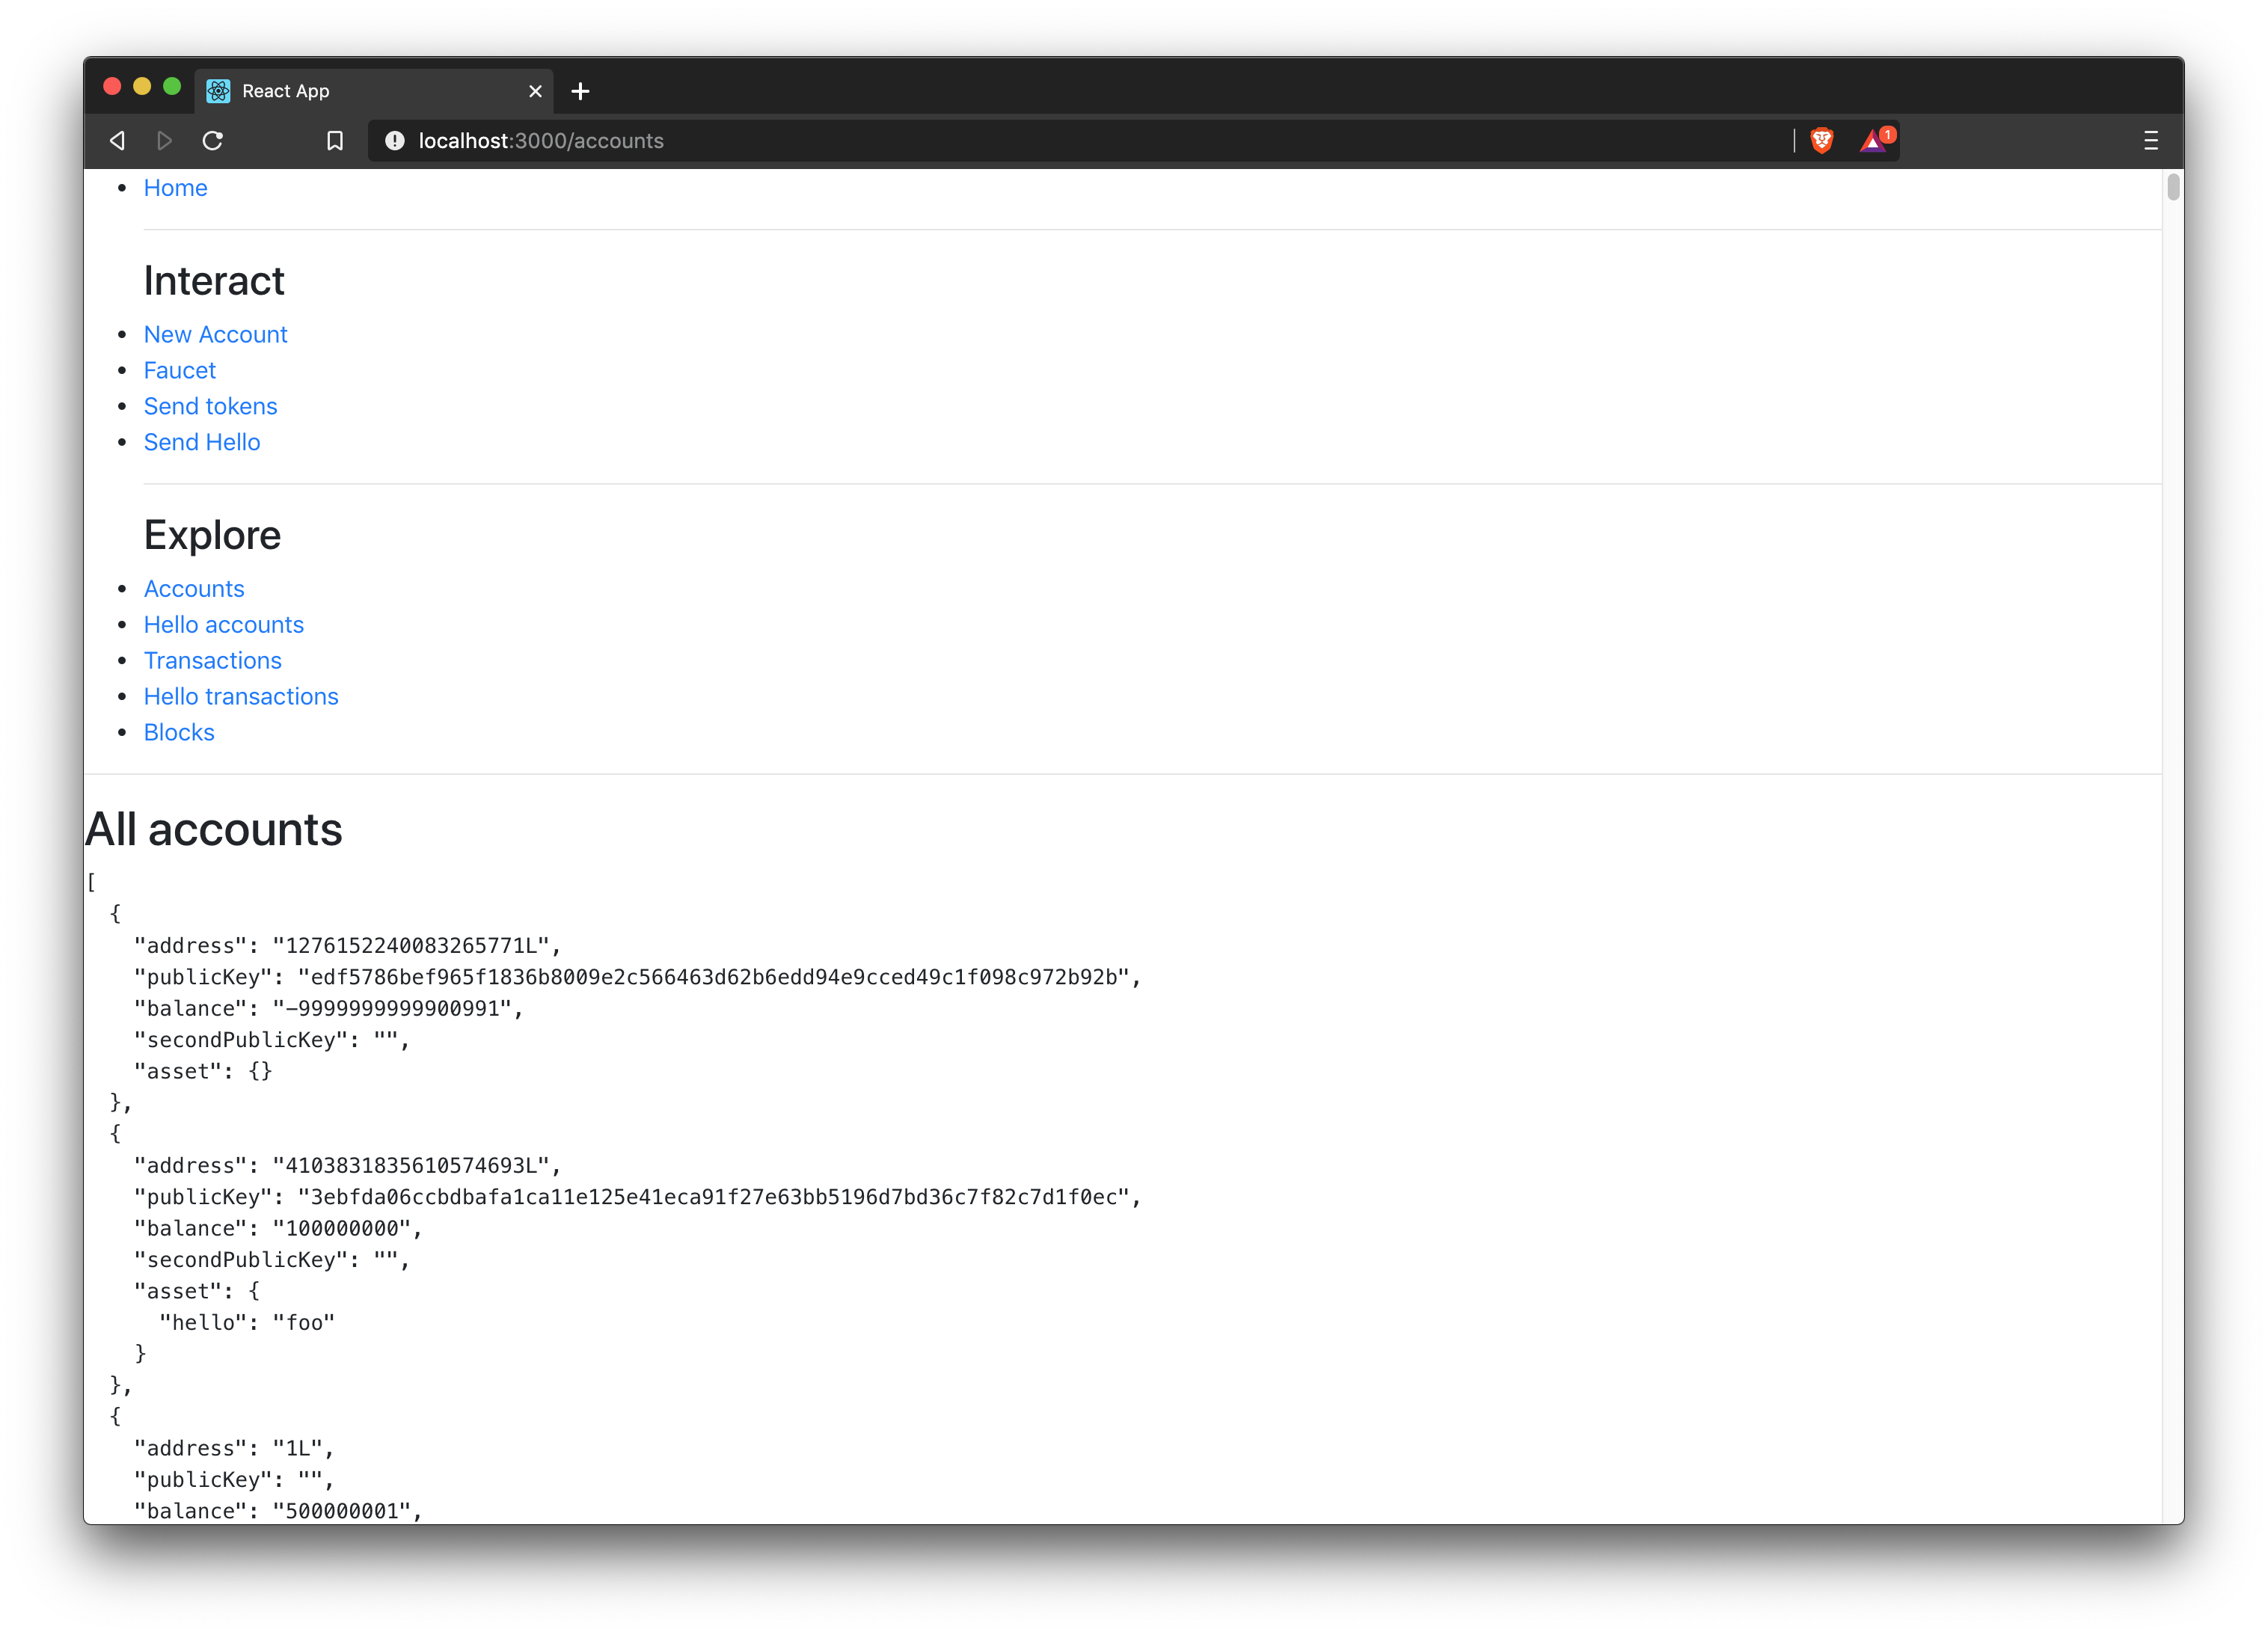
|
The loop here is implemented in a very basic manner in order to keep it simple. This is adequate for proof of concept applications with a minimal amount of data. However, for production networks, it would be necessary to implement a solution that has the ability to scale with a large amount of data. |
import React, { Component } from 'react';
import { api } from '../api.js';

class Accounts extends Component {

    constructor(props) {
        super(props);

        this.state = { data: [] };
    }

    async componentDidMount() {
        let offset = 0;
        let accounts = [];
        const accountsArray = [];

        do {
            const retrievedAccounts = await api.accounts.get({ limit: 100, offset });
            accounts = retrievedAccounts.data;
            accountsArray.push(...accounts);

            if (accounts.length === 100) {
                offset += 100;
            }
        } while (accounts.length === 100);

        this.setState({ data: accountsArray });
    }

    render() {
        return (
            <div>
                <h2>All accounts</h2>
                <pre>{JSON.stringify(this.state.data, null, 2)}</pre>
            </div>
        );
    }
}
export default Accounts;
Get accounts based on asset data
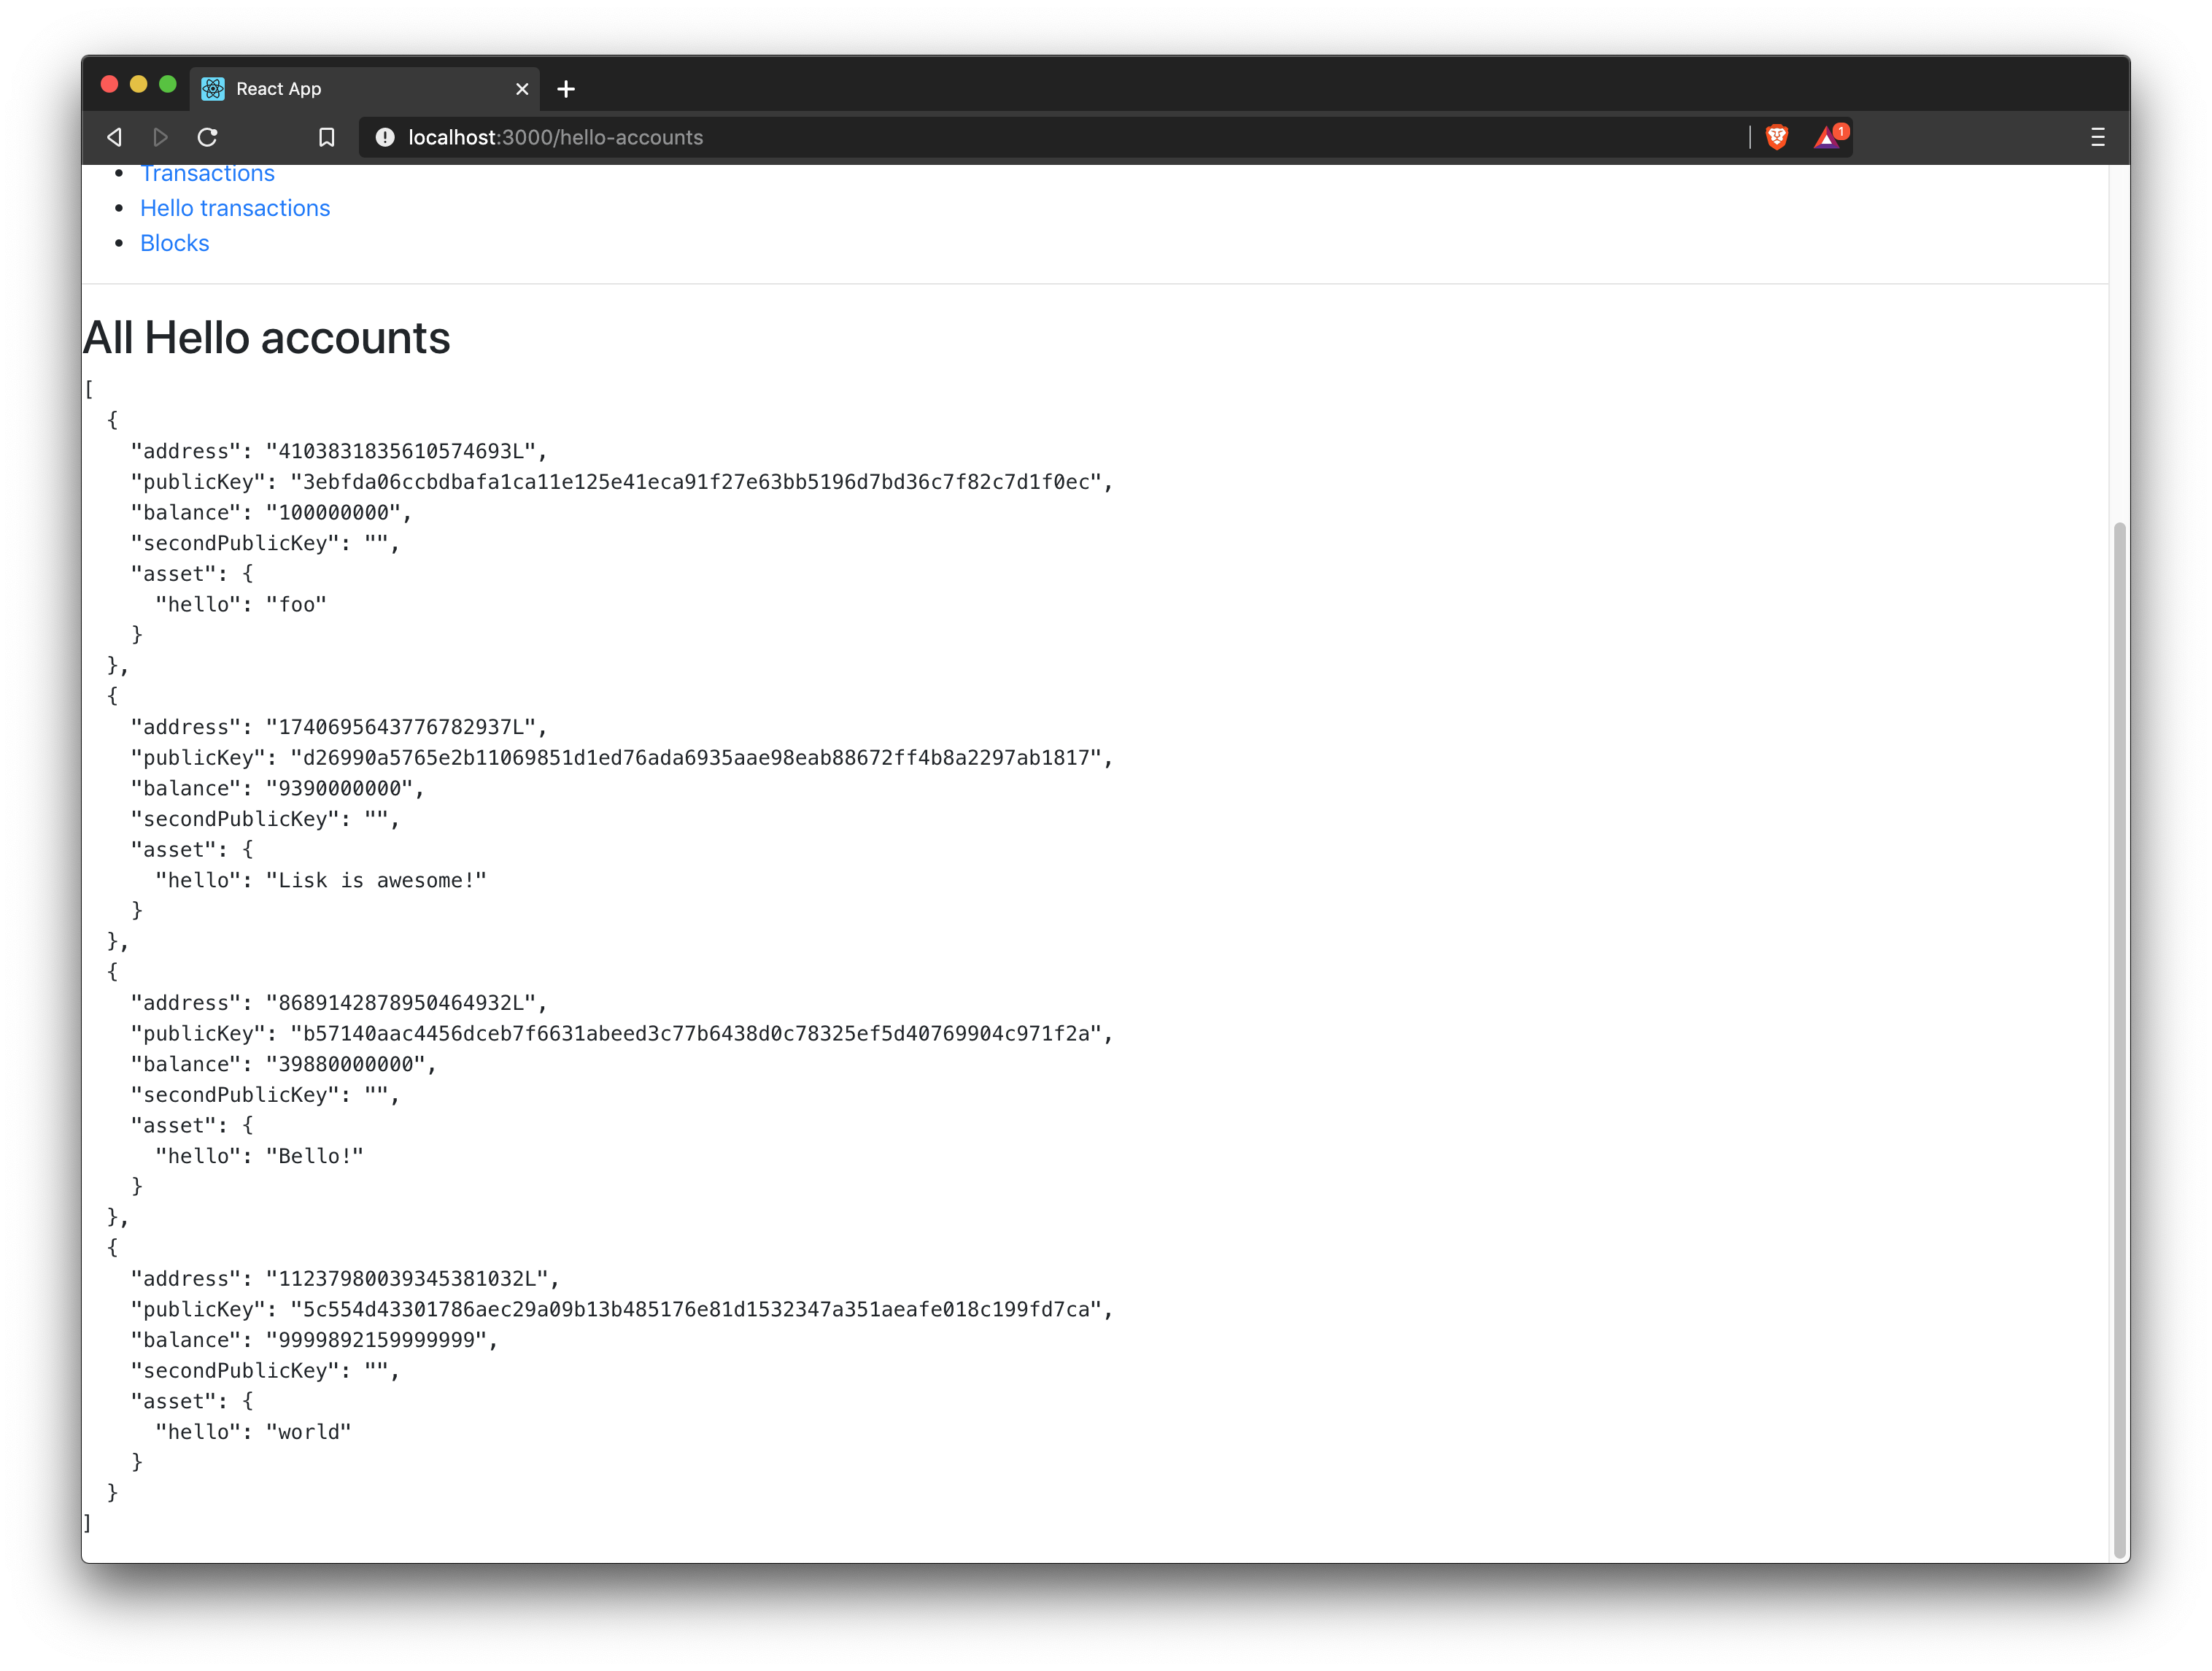
How to display all accounts on a web page is described here.
In this example below, the accounts are filtered after existence of the asset.hello property of on account.
import React, { Component } from 'react';
import { api } from '../api.js';

class HelloAccounts extends Component {

    constructor(props) {
        super(props);

        this.state = { data: [] };
    }

    async componentDidMount() {
        let offset = 0;
        let accounts = [];
        let accountsArray = [];

        do {
            const retrievedAccounts = await api.accounts.get({ limit: 100, offset });
            accounts = retrievedAccounts.data;
            accountsArray.push(...accounts);

            if (accounts.length === 100) {
                offset += 100;
            }
        } while (accounts.length === 100);

        let assetAccounts = [];
        for (var i = 0; i < accountsArray.length; i++) {
            let accountAsset = accountsArray[i].asset;
            if (accountAsset && Object.keys(accountAsset).indexOf("hello") > -1){
                assetAccounts.push(accountsArray[i]);
            }
        }

        this.setState({ data: assetAccounts });
    }

    render() {
        return (
            <div>
                <h2>All Hello accounts</h2>
                <pre>{JSON.stringify(this.state.data, null, 2)}</pre>
            </div>
        );
    }
}
export default HelloAccounts;
Get all transactions
How to display all transactions on a web page is covered here.
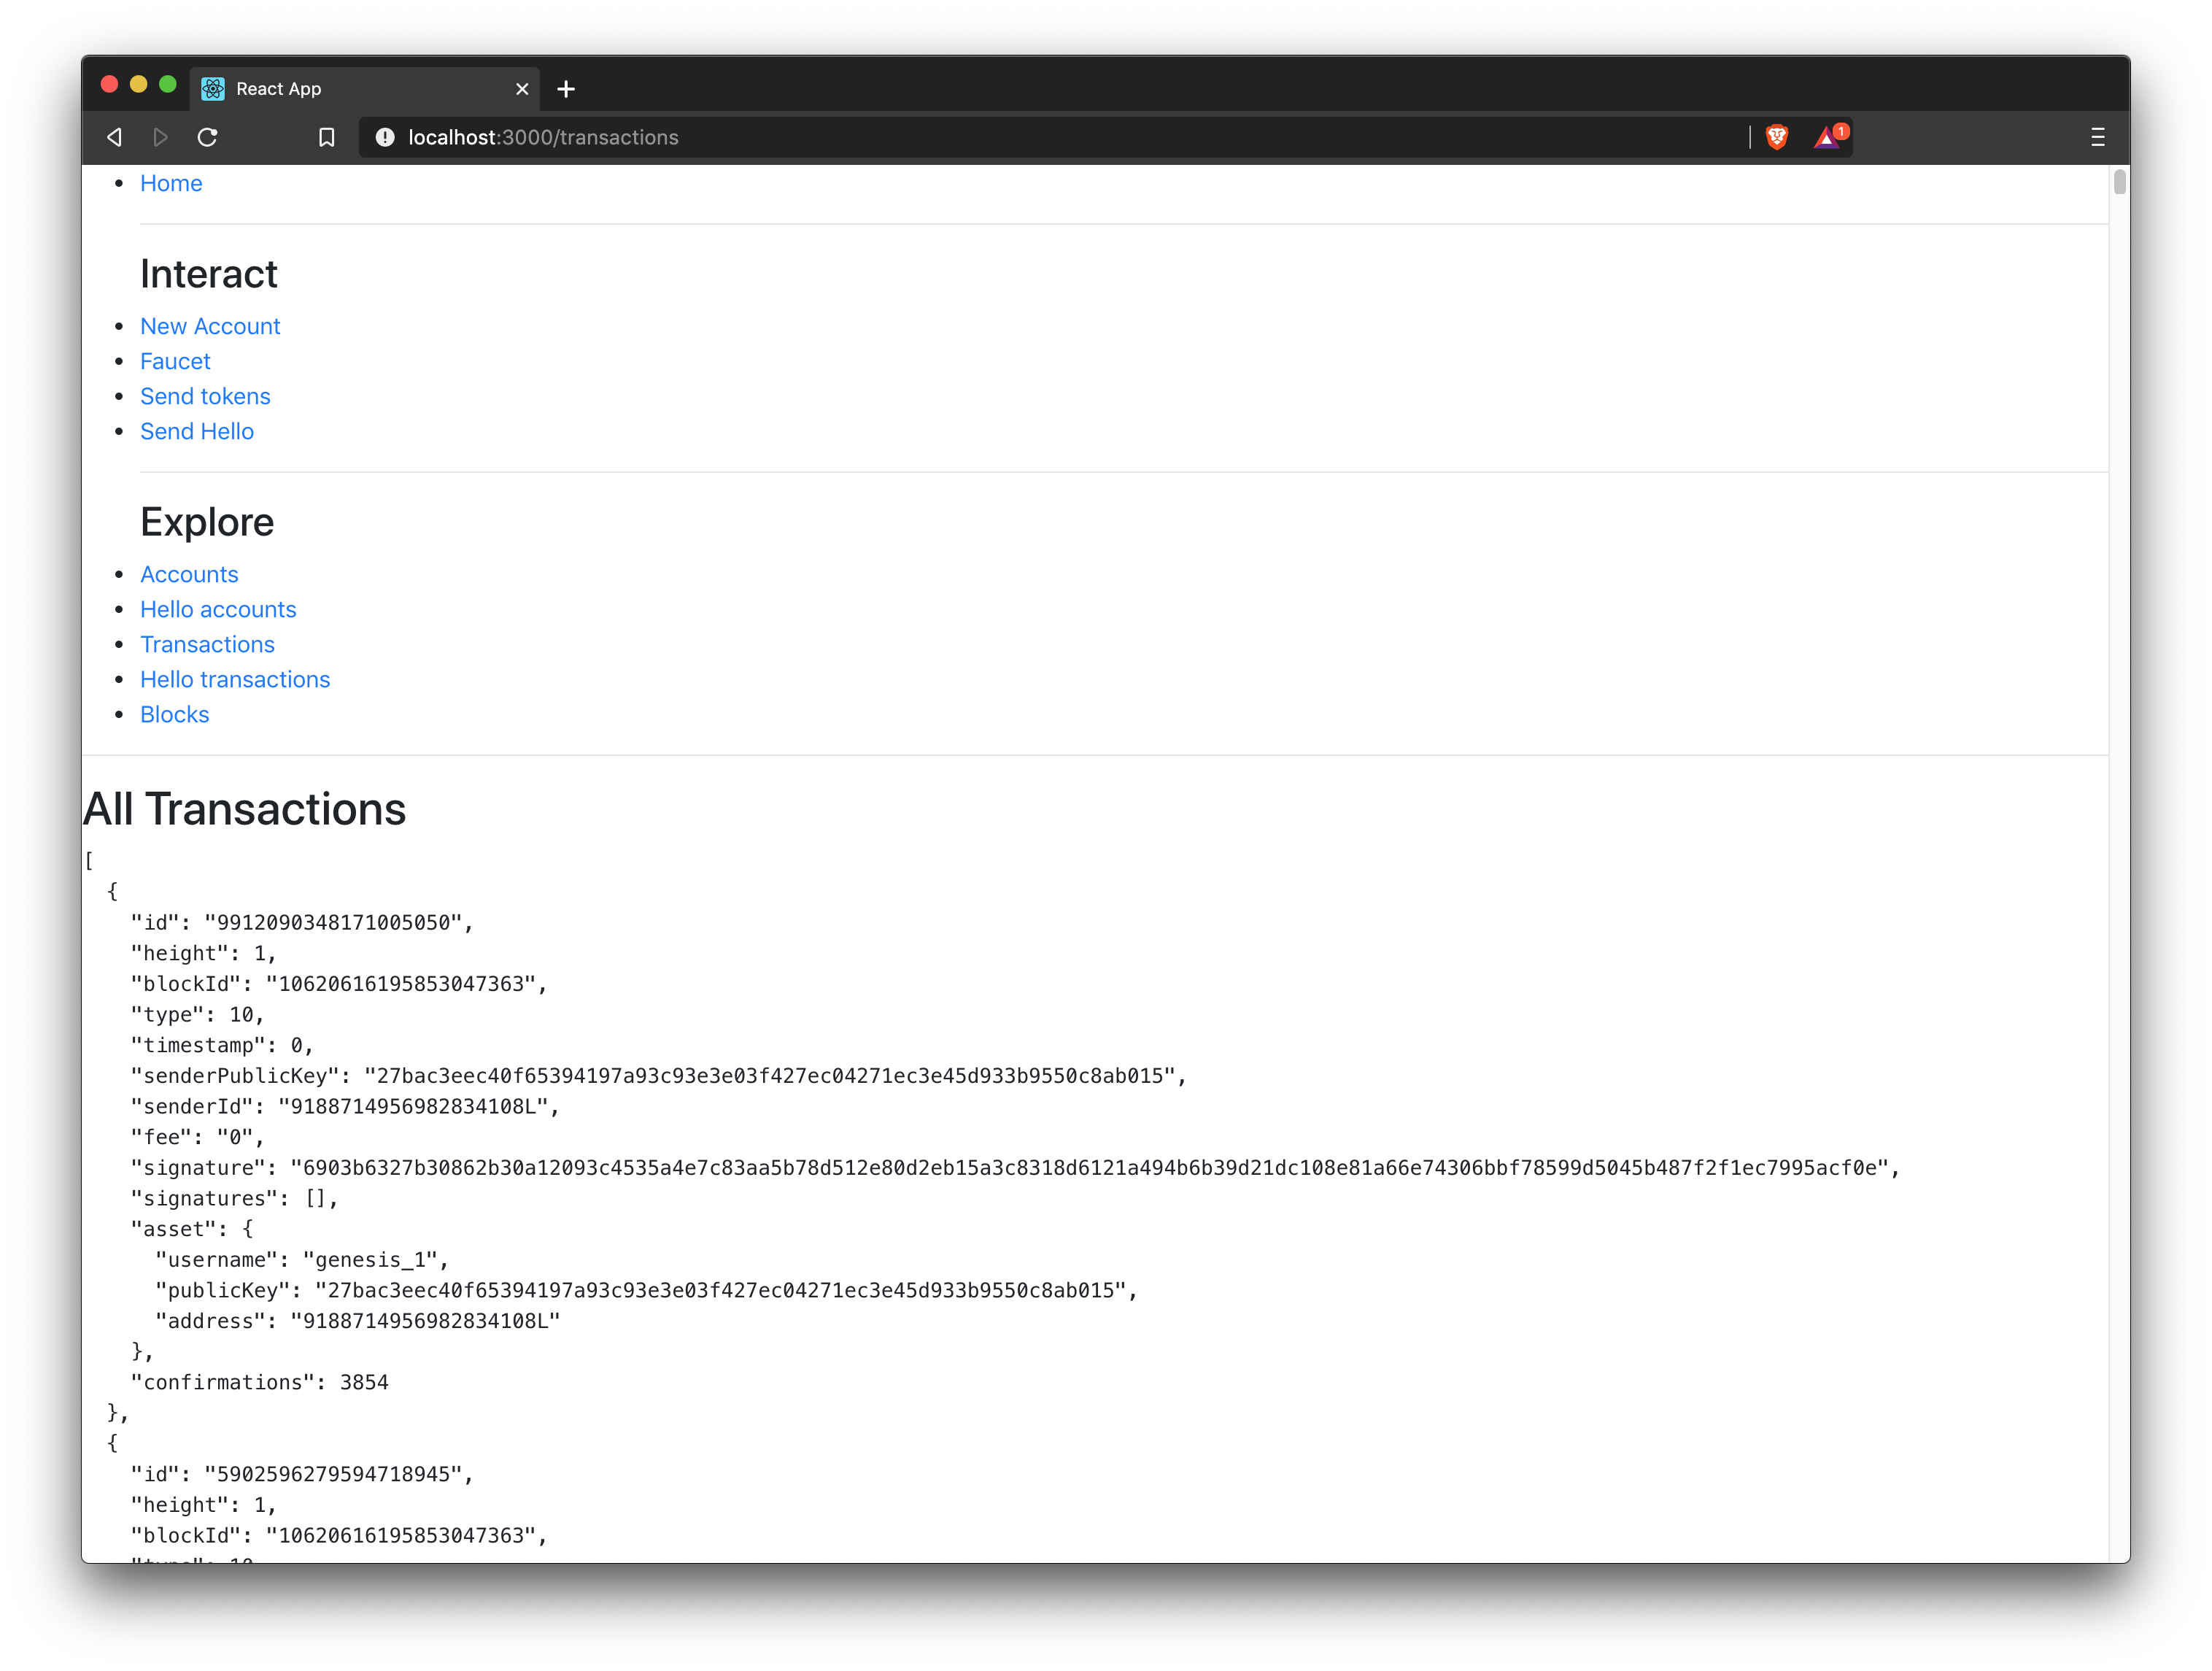
|
The loop here is implemented in a very basic manner in order to keep it simple. This is adequate for proof of concept applications with a minimal amount of data. However, for production networks, it would be necessary to implement a solution that has the ability to scale with a large amount of data. |
import React, { Component } from 'react';
import { api } from '../api.js';
class Transactions extends Component {
constructor(props) {
super(props);
this.state = { data: [] };
}
async componentDidMount() {
let offset = 0;
let transactions = [];
const transactionsArray = [];
do {
const retrievedTransactions = await api.transactions.get({ limit: 100, offset });
transactions = retrievedTransactions.data;
transactionsArray.push(...transactions);
if (transactions.length === 100) {
offset += 100;
}
} while (transactions.length === 100);
this.setState({ data: transactionsArray });
}
render() {
return (
<div>
<h2>All Transactions</h2>
<pre>{JSON.stringify(this.state.data, null, 2)}</pre>
</div>
);
}
}
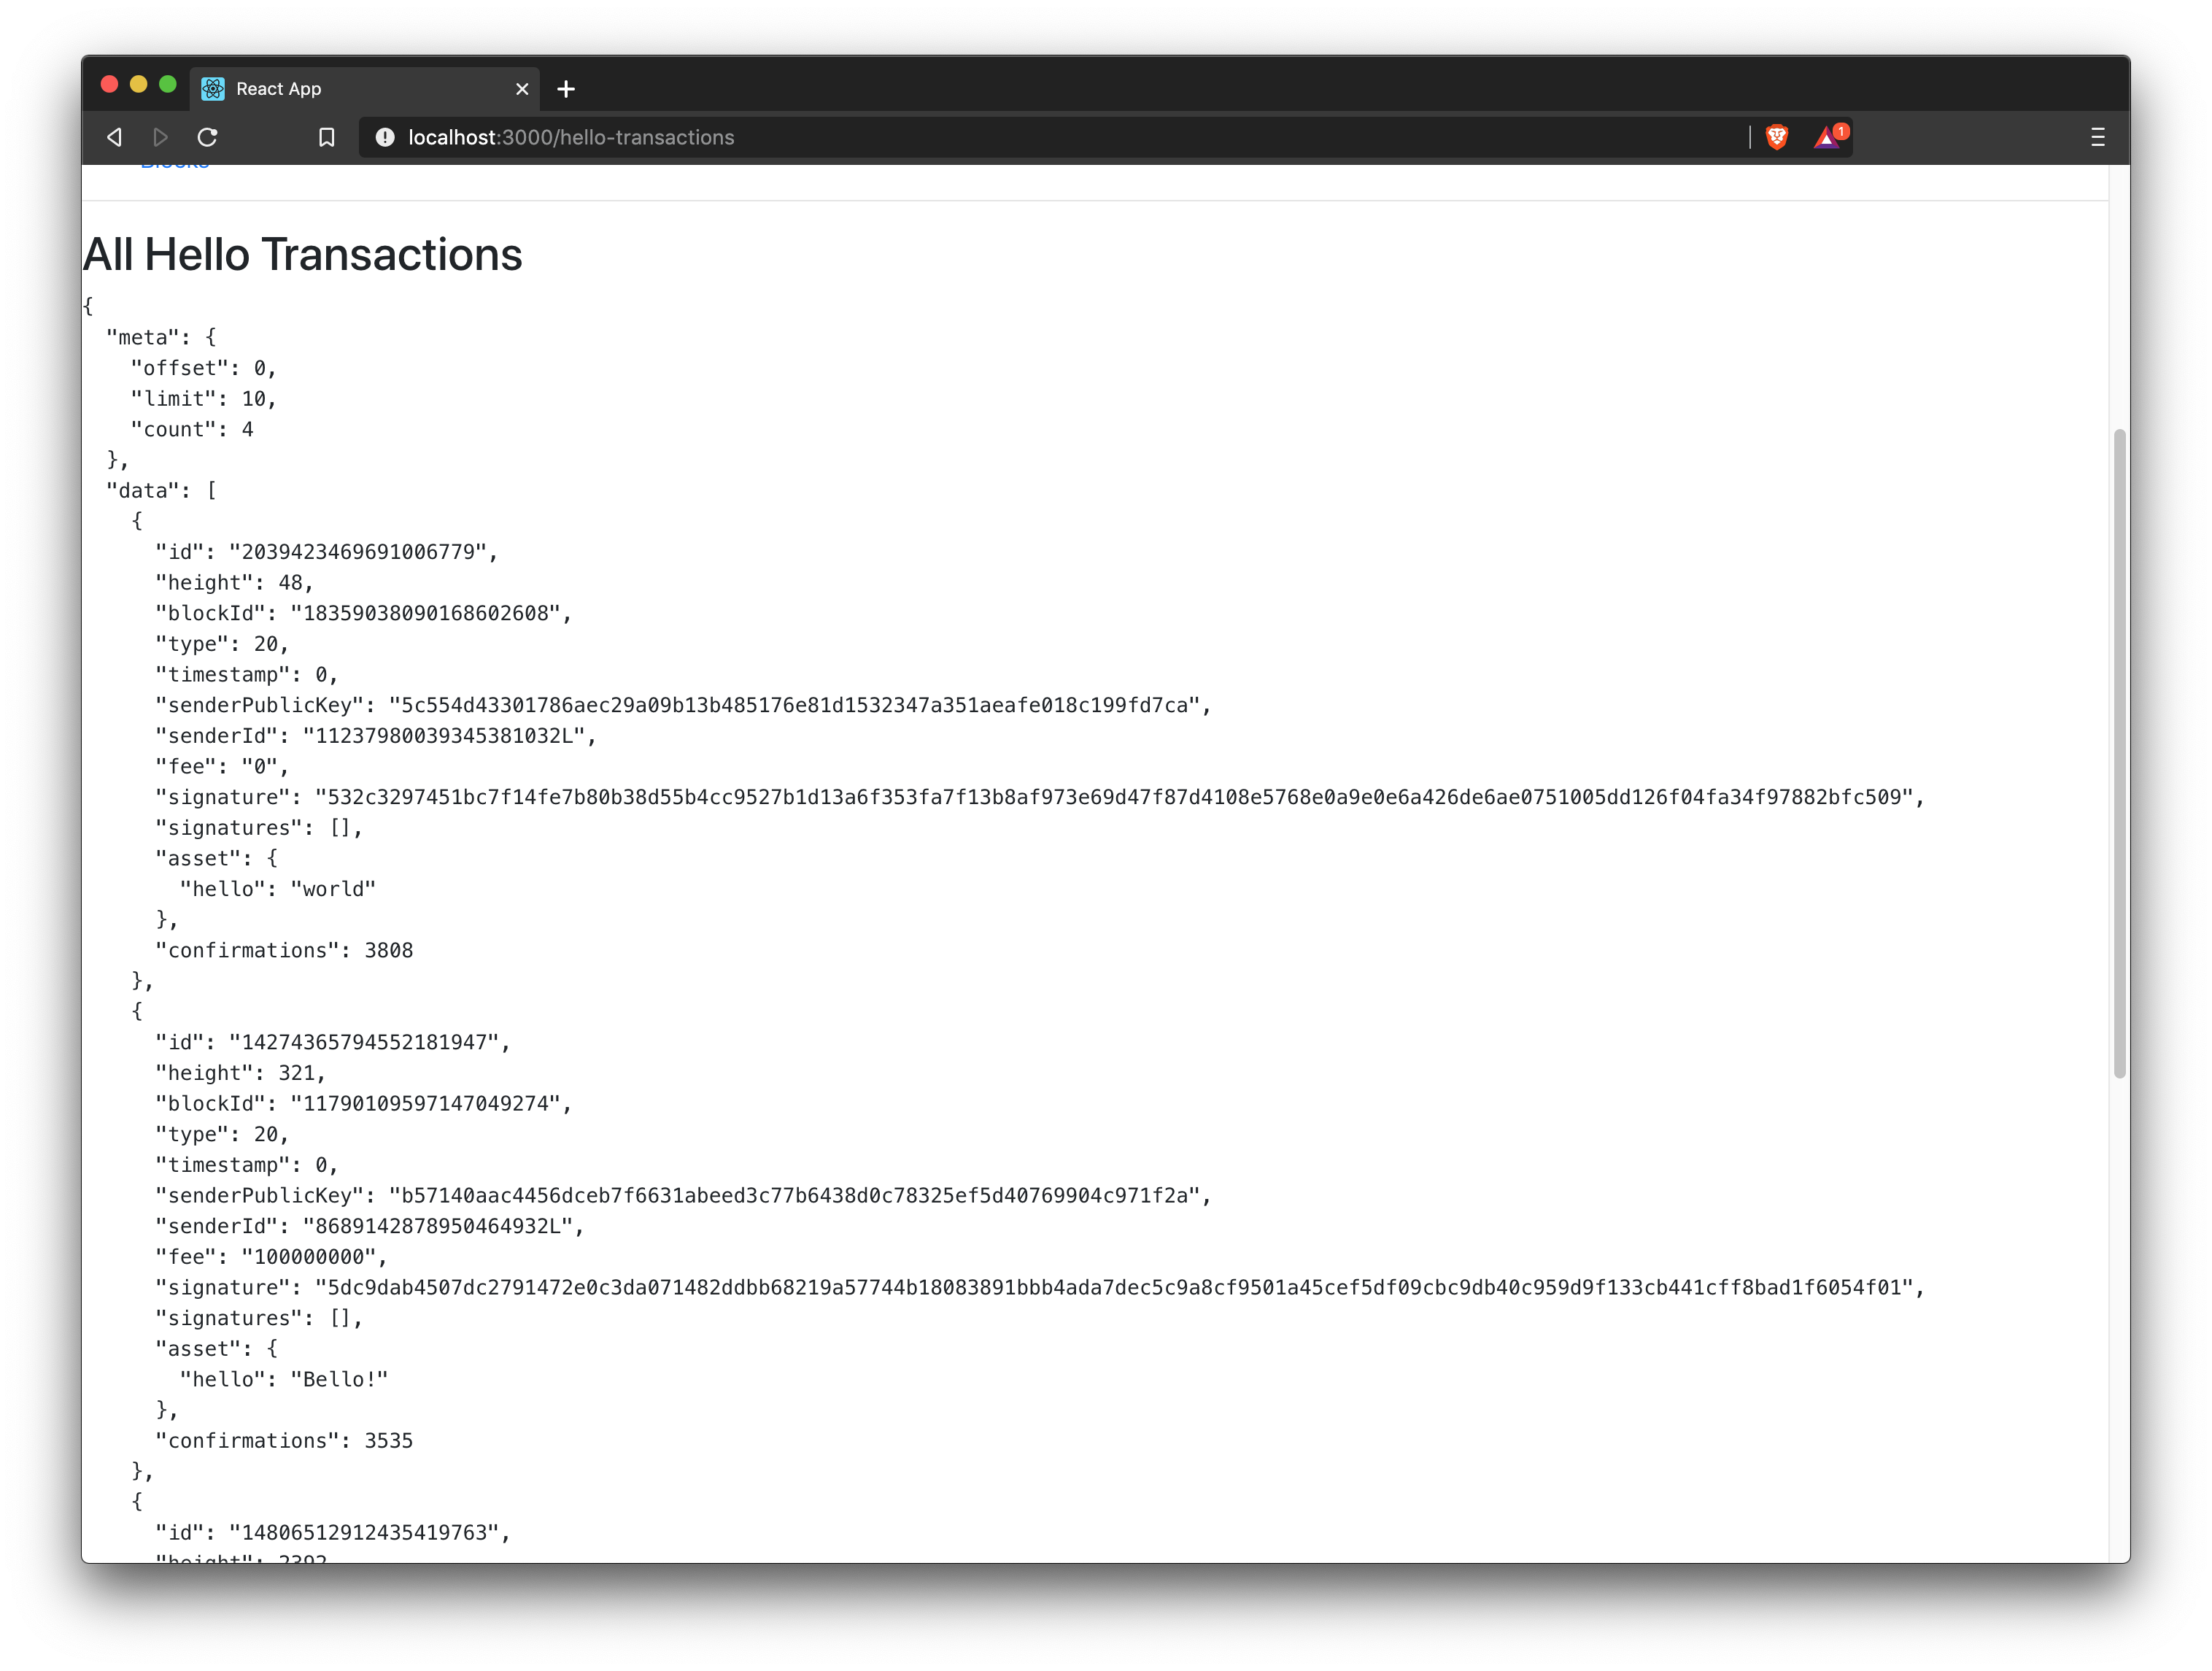
export default Transactions;Get transactions by type
How to display all transactions of a particular type on a web page is covered here.
In this example below, it is shown how to filter for hello transactions.
import React, { Component } from 'react';
import { api } from '../api.js';
import {
HelloTransaction,
} from 'lisk-hello-transactions';
class HelloTransactions extends Component {
constructor(props) {
super(props);
this.state = { data: [] };
}
async componentDidMount() {
const transactions = await api.transactions.get({ type: HelloTransaction.TYPE });
this.setState({ data: transactions });
}
render() {
return (
<div>
<h2>All Hello Transactions</h2>
<pre>{JSON.stringify(this.state.data, null, 2)}</pre>
</div>
);
}
}
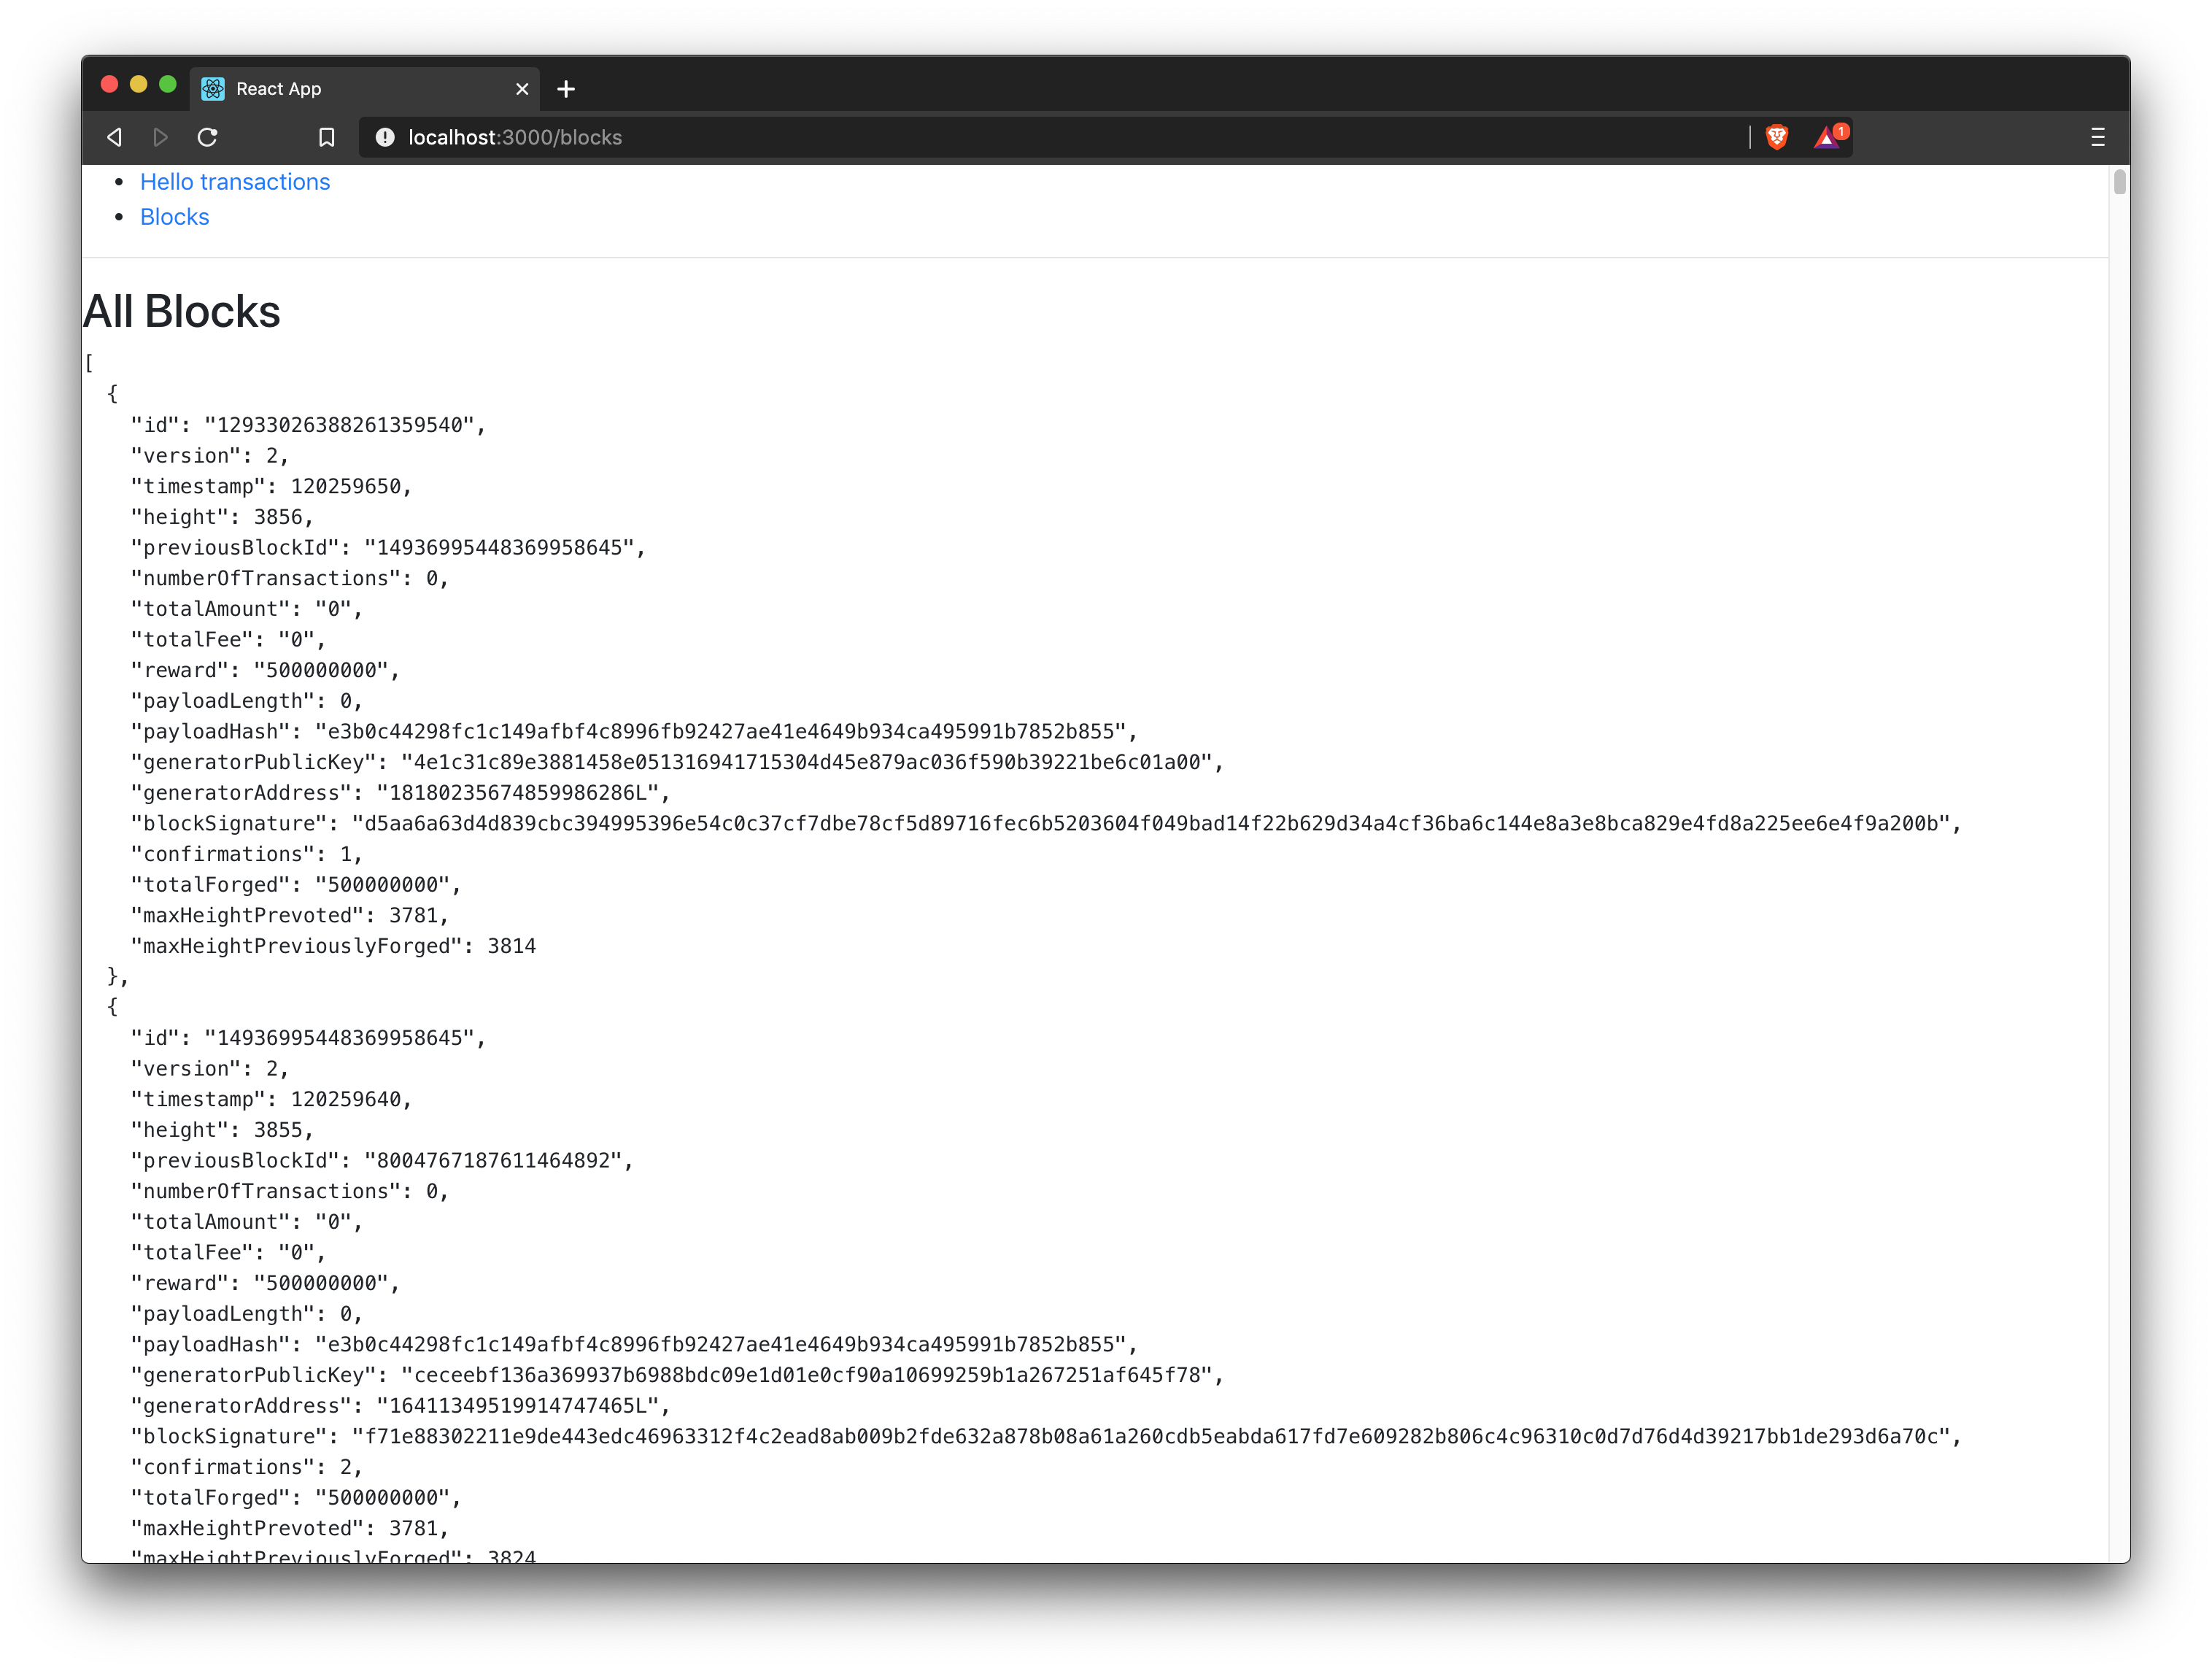
export default HelloTransactions;Get all blocks
How to display all blocks on a web page is shown here.
|
The loop here is implemented in a very basic manner in order to keep it simple. This is adequate for proof of concept applications with a minimal amount of data. However, for production networks, it would be necessary to implement a solution that has the ability to scale with a large amount of data. |
import React, { Component } from 'react';
import { api } from '../api.js';

class Blocks extends Component {

    constructor(props) {
        super(props);

        this.state = { data: [] };
    }

    async componentDidMount() {
        let offset = 0;
        let blocks = [];
        const blocksArray = [];

        do {
            const retrievedBlocks = await api.blocks.get({ limit: 100, offset });
            blocks = retrievedBlocks.data;
            blocksArray.push(...blocks);

            if (blocks.length === 100) {
                offset += 100;
            }
        } while (blocks.length === 100);

        this.setState({ data: blocksArray });
    }

    render() {
        return (
            <div>
                <h2>All Blocks</h2>
                <pre>{JSON.stringify(this.state.data, null, 2)}</pre>
            </div>
        );
    }
}
export default Blocks;